Saturday, April 30, 2011

"Chicken" Fried Dinner Patties

I got this recipe from an old ward we were in. I really wish I remembered the name of the woman who gave it to me. Maybe I'll be able to find a note around here somewhere. Anyway, this is a pretty good recipe for using up food storage items. It's also pretty tasty. I will say that I didn't think it tasted much like chicken, but for oats, I imagine it's about as close as I could get!

I will also say that I liked this recipe a little different from the way outlined here, so I'll give the directions to make the patties and then I'll tell you the alternate directions to make a "chicken" fried dinner.

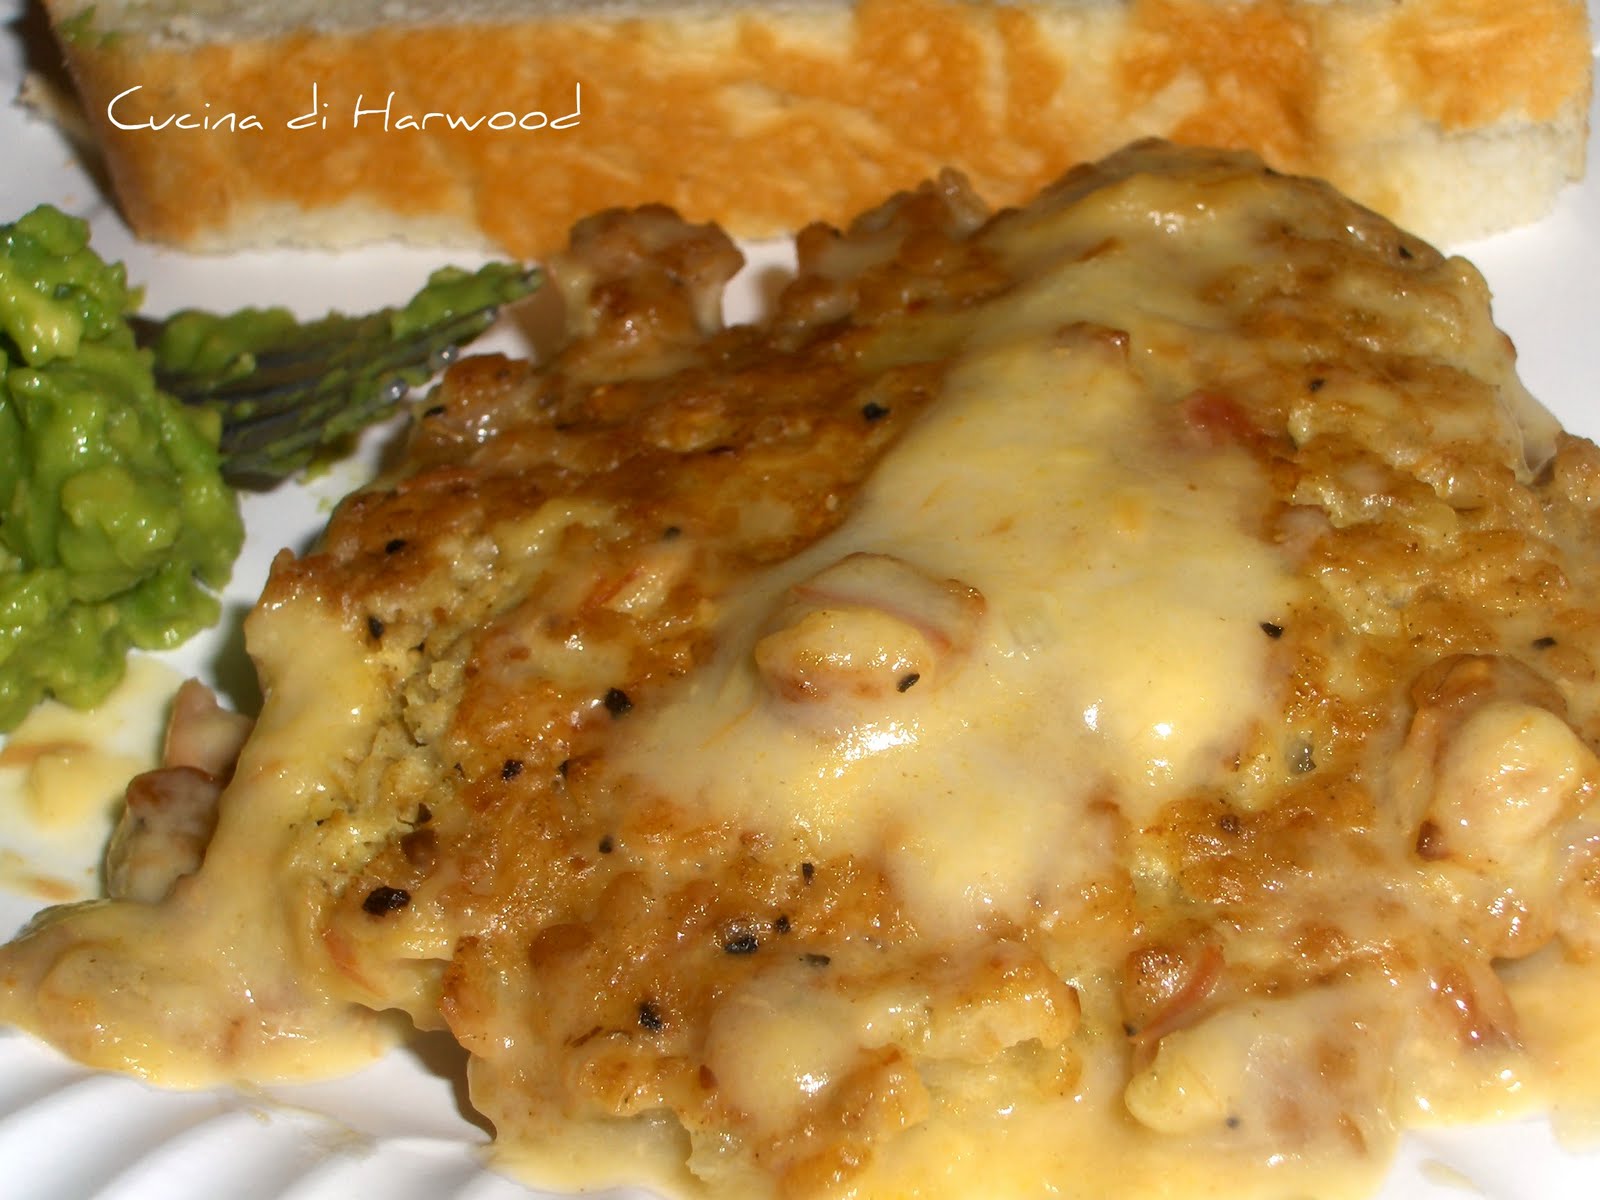
"Chicken Fried" Dinner Patties
Servings: Approx. six "chicken" patties

Ingredients:
Patties:
3/4 c. finely chopped onion
1 small clove garlic, mince
3/4 c. quick oats
2 large eggs
1 1/2 tsp. Montreal steak seasoning
1/2 tsp. ground sage

Sauce:
1/2 can cream of mushroom soup
1/4 c. milk or yogurt
1/8 to 1/4 tsp. garlic salt

For frying:
3 Tbsp. oil

Gravy:
1/2 can cream of mushroom soup
1 cup milk
1 packet chicken gravy mix or some other form of gravy mix.

Directions:
Mix finely chopped onions, garlic, quick oats, eggs, seasonings. In large fry-pan, heat oil on medium high. Using a large spoon place a large spoonful of mixture at a time into hot oil and smooth mixture with back of spoon to create a patty. You could also your hands to try to create a patty before putting the mixture into the pan. This is kind of messy and sometimes the patties won't hold together very well {this is where I found my alternate method helpful}.
Brown well on both sides, turning only once {the more often you turn them, the more likely they are to fall apart}. Patties will be lightweight at this point.
Turn heat to lowest simmer. Mix soup, milk or yogurt and garlic salt in a medium sized bowl; spoon over patties, turning to coat both sides. Cover and simmer 30 to 40 minutes until all liquid is absorbed. {Carefully turn patties a time or two while they are simmering/absorbing liquids.}
Serve with rice or pasta and gravy.

Gravy:
Combine the soup, milk, and chicken gravy mix together. Bring to a boil in a medium sauce pan then turn down heat and simmer for 10-15 minutes, or until thickened. If the gravy doesn't thicken enough, add about a tablespoon of flour and mix until fully incorporated.


Alternate Cooking Method:
Place the entire oat mixture into the pan with hot oil. Cook as if browning ground beef, just not quite as long. It only takes a couple of minutes. Then add the sauce to it and simmer for 30 minutes, stirring occasionally. While the oat/sauce mixture is simmering, make some rice. When both the rice and the "chicken" fried dinner are finished, combine them together and top with gravy. 
Enjoy!

Monday, April 4, 2011

Hash Brown & Pepper Jack Quiche

The first exposure I had to quiche was this recipe. I actually hadn't had the "real" quiche, you know, with a pie crust, for several years after trying this recipe. Now, don't get me wrong, I actually really like "real" quiche, but I love this recipe using hash browned potatoes as the crust instead. Sooo yummy. This is a recipe my husband's family makes and we all love it!


Hash Brown and Pepper Jack Quiche
Recipe from Olive Harwood

20 oz frozen hash brown potatoes, thawed
1 cup shredded pepper jack cheese
1 cup shredded Swiss cheese
1 cup diced ham
4 eggs
1/2 cup milk
1/4 tsp salt


Directions:
Press the hash browns into a well greased pie tin or round cake pan. Bake for 20-25 minutes at 425 degrees.
Put the cheeses and the ham on top of the potatoes.
In a small bowl, mix the eggs, milk and salt together. Pour over the rest and bake for 25-30 minutes at 425 degrees. It is done when a knife inserted half way from the edge to the center comes out mostly clean. Let stand for a few minutes and serve.
We like to eat this with fruit. Mmmm. :)

Saturday, April 2, 2011

Country Potatoes

Many in my church call these "funeral potatoes". I guess it's because this is an easy, quick meal to take to a funeral. However, regardless of what you call these potatoes, they are scrumptious! One of my favorite ways to prepare potatoes. The corn flakes on top do make it hard to store these but I have found that if I need to store leftovers in the refrigerator that I just add some extra corn flakes right before reheating and then I don't have to worry about losing that crunch that comes from the flakes.


Country Potatoes
Recipe from Diane Bingham
6 potatoes, baked and cooked, peeled and shredded
1 can cream of chicken soup
1/3 cup chopped onion
1/4 cup melted butter
1 cup sour cream
1 cup cheddar cheese, shredded
1 cup crushed corn flakes

Directions:
Mix the chicken soup, chopped onion, butter and sour cream together until creamy. Add the potatoes and cheese and stir until well incorporated. Put in a well greased 9x13 baking pan. Top with the crushed corn flakes. Bake at 350 degrees for 45 minutes or until the inside is warm. Serve topped with extra cheese and sour cream.


Delicious!

Wednesday, March 30, 2011

Chicken Salad

I really love chicken salad. It is one of my favorite summer recipes. The combo of sauces, grapes and chicken is magical, I'm tellin' ya! This particular recipe is probably my favorite.


Chicken Salad
Recipe from Budget Bites

2 1/2 cups diced, cooked chicken meat, chilled or 2 12 oz cans of chicken
1 cup chopped celery (optional - I haven't ever used the celery - it's not my fav in this salad)
2 green onions finely diced, use the white and green parts
1 cup sliced, seedless grapes (or apples)
1/2 cup sliced almonds (optional)
2 tablespoons chopped fresh parsley or 2 tsp dried parsley
1 teaspoon salt
2/3 to 3/4 cup cup mayonnaise {note: original recipe calls for 1 cup of mayonnaise but it makes it much too heavy for my taste}
1/4 cup heavy whipping cream

Directions:
In a medium bowl, whip cream to soft peaks. Combine meat, celery, green onion, grapes/apples, almonds, parsley, salt, and mayonnaise with whipped cream. Chill and serve in Pita Pockets or on a croissant roll.
Even though this photo stinks, the salad is really yummy in these Pita Pockets.

Saturday, March 26, 2011

Pita Bread

Before finding this recipe, I had never really had pita bread. But with this recipe, it is one of my favorite breads. Actually, lets be real. I love bread period. But this one is really yummy. Like really, really. It is also pretty easy. The biggest thing is just remembering far enough ahead and starting early enough because it does take time with rising and whatnot. This particular recipe is really great for creating pockets or if you want pita bread, just slice each "pocket" in half and then put whatever you want on it. Just a little note, the original recipe has directions for using your bread machine to make this. I don't have a bread machine so I'll give directions using what I do have. If you want to know how to make this with your bread machine, just follow the link for Budget Bites.

Pita Bread
Recipe from Budget Bites 

Ingredients:
1-1/4 cup milk, warmed in microwave for 1 minute
2 Tablespoons olive oil
1-1/2 teaspoons sugar
3/4 teaspoon salt
3 cups bread flour**
1 teaspoon rapid rise yeast**

Directions:
Add ingredients, in the order listed, to a large bowl or the bowl of a large mixer. 
If hand kneading this dough, knead it for 5-8 minutes. If using a large mixer with a dough hook, let it mix for about one minute, then stop it to scrape the edge of the bowl and then turn it back on to finish mixing for a couple more minutes.
Dough should be soft and almost spongy. Remove dough from bowl and put on a well floured surface, cover with a kitchen towel. Let rest for 10 minutes {this helps make it easier to shape the dough}.

On a lightly floured surface divide dough into 8-12 balls {the number of balls you make depends on the size of pitas you want- more balls = smaller pitas} and roll each ball into a flat disk about 1/4" thick. Cover dough and let rise until slightly puffed, about 30 minutes.

Place 1/2 of pita rounds on a greased baking sheet {I used an upside down cookie sheet} and bake in the bottom of a 450 F oven for 4-5 minutes, or until bread is puffed {the dough doesn't brown, so don't wait for browned pitas or they'll be burnt}. Just watch them and be sure to remove them when they are looking really puffed, but no longer than 5 minutes. Remove from oven and repeat with remaining dough. When cooled, cut a slit in the side of each pita, fill with your favorite filling and enjoy!


** Note: Bread flour and rapid rise yeast are essential to making homemade bread. These two ingredients help ensure a fluffier product than if you used regular all-purpose flour and a different type of yeast. You can use other flour and yeast, however, you're bread will turn out more dense.

Thursday, March 24, 2011

White Sauce Enchiladas

I am a pretty big fan of enchiladas. I really love green sauce enchiladas. So I decided to try a new idea and go with some white sauce. Mmm, I'm so glad I did! This recipe is sooo yummy! Seriously, you won't regret making these.


White Sauce Enchiladas
Recipe slightly adapted from $5 Dinners

Ingredients:
4 oz cream cheese
1 1/2 cups sour cream
1/2 cup chicken broth
1/2 cup shredded, cooked chicken
1/2 cup green onion, chopped
1/2 can green chilies {I liked the slightly more subtle flavor I got by only using half the can but if you like more spice, you can use the whole thing}
1/2 tsp garlic powder
1 can whole kernel corn, drained
Tomatoes, sliced
5-6 whole wheat tortillas

Directions:
In a large skillet, melt the cream cheese with the sour cream over medium-low heat. Once all melted and mixed together, add the green chilies and the chicken broth. Stir together until well incorporated. You can add more chicken broth if you want a thinner consistency. Add garlic powder.
Reserve about 1/2-1 cup of the cream cheese mixture; set aside. Add the chicken to the remaining sauce. Stir in the chicken and let simmer about 10 minutes so the flavors can begin to infuse. When there is about a minute left, add the can of corn and stir.
Spoon the cream cheese chicken mixture into warmed tortillas. Roll and place into an 8x8 baking dish. You'll get between 5-6 enchiladas in the dish.
Spread the reserved cream cheese mixture over the top. Top with sliced tomatoes and sprinkle shredded cheese over that. Bake for 15-20 minutes at 350 degrees.

The tomatoes give it a really nice light flavor and help round out the white sauce. You could reserve the corn and serve it on the side instead of inside the enchiladas, whichever your preference is.
Scrumptious!

Tuesday, March 22, 2011

Homemade Burritos

My hubby and I are big burrito fans. We really love them around here. I've worked and worked on a recipe until I finally came up with what we think is the perfect burrito recipe. Now, I once mentioned to my dad that I had come up with this great recipe and he said to me, in effect, "The real way to do it is to put lard in it." And I basically went, "Um, yuck." I mean in no way for that to offend anyone. Just for some reason the idea of lard kind of grosses me out. There is no lard in this recipe. None. Zilch. Nada. So I guess that makes this recipe about as non-authentic as you can get. However, I still think it tastes good. :)
Yes, I know. It looks like I have large ugly man hands.
Homemade Burritos
Recipe created by Cucina di Harwood
1/2 lb ground hamburger
1 can Refried Beans
2 1/2 Tbsp water
1/2 tsp chili powder
1/2 tsp dried cilantro or 1/2 cup fresh cilantro, finely chopped
1/2 tsp dried basil
1 1/2 tsp  Worcestershire sauce
1/3 cup low fat sour cream
2 Tbsp. Salsa Verde
1/2 cup shredded cheese
Dash of pepper
Tortillas
Desired toppings - I really like spinach, tomatoes, green peppers, green onions, and extra cheese 'cuz I love cheese. Mozzarella is my favorite. Other good toppings are ranch, salsa or taco sauce.

Directions:
Brown the hamburger over medium heat until cooked; drain. Add the remaining ingredients and mix well. Cook until heated through. Put a scoop on your tortilla and add any toppings you so desire. 
This is also be yummy with a scoop of rice on the tortilla as well.
Yum!

Sunday, March 20, 2011

Beef Steamer

I have no idea where I originally found the idea for this recipe. It's something that a lot of people probably figure has been around forever, I just hadn't made anything similar before this. Anyway, as I said, I don't remember where I found the original inspiration. But I took the idea and ran with it and this is what I came up with. 
This recipe is pretty much perfect for kids. I can't think of a kid I know who wouldn't like this stuff. It's a very simple, no-nonsense kind of recipe. Really, just meaning that it isn't complex with the flavors. The simplicity makes it a quick lunch or kid's meal, and since you put lots of veggies in it, I would feel okay feeding it to my daughter - at least, as soon as she is old enough to eat food like this, that is!.


Beef Steamer
Recipe from Cucina di Harwood


1 can chili
1 can tomoato soup
1/2 Tbsp. Chili powder
1 tsp garlic powder
1/3 tsp salt
1 lb. ground beef
1 cup dry macaroni or other pasta, cooked
1 onion, chopped
2-3 large carrots, grated
2-3 large florets of broccoli, chopped in small pieces {optional}
1/2-1 cup grated cheddar cheese

Directions:
Brown hamburger with onion; add green pepper just before the burger is completely cooked. If the hamburger is very greasy, add some flour to help soak up the grease. Add the rest of the ingredients and cook until warmed through.
If you would like the steamer a little more like soup, you could add some water. The macaroni and the cheese can be substituted for leftover macaroni and cheese.

Friday, March 18, 2011

Bean Chicken Wraps

This past weekend I saw my younger brother and he commented about this lil' ole cooking blog. It made me happy to know that someone out there actually looks at these recipes and enjoys them. He told me that he really likes my cooking site and thinks it's pretty good. However, he also said, "But you need more real food. You've got a lot of treats, but you need more main dishes, like Italian and meat dishes." I told him I'd work on that. :) So I came home and looked in my food photo folder and discovered that I've got lots of main dish recipes I haven't shared. So over the next couple of weeks I'll share a few that I've got saved up. Of course, they don't all fall under the meat or Italian categories, but they are main dishes! ;)

This recipe was inspired by one of those e-mail recipe exchange things. I'm sure most people have had them. But you know, they don't usually turn out as they should in theory. I'm lucky if I get one recipe back. Sad, sad. Anyway, I participated in one once and I got a recipe back that inspired this one. It is really yummy and so easy to put together. I think it's a perfect lunch recipe.


Bean Chicken Wraps
Recipe from Cucina di Harwood
Servings: 6-8
Prep time: 10 minutes -- Cooke time: 15 minutes

1 large chicken breast, cooked in garlic and cut into bite size cubes
1 12 oz or so can white beans, mostly drained {any kind of white bean works well}
1/2 yellow or green pepper, chopped
1/2 cup green onion, chopped - use green and white parts of the onion
1 tsp Italian seasoning
Salt and pepper to taste
1-2 Tbsp lemon juice
1/2 cup shredded 
1 cup cooked rice
Tortillas

Directions:
Mix together the beans and chicken. Put into an oven safe casserole dish. Top with onions, peppers, seasonings and juice and lightly fold into the beans mixture. Top with shredded cheese and bake at 350 for 15 minutes or until cheese is melted and bubbly. 
Warm tortillas in microwave for a few seconds so they are pliable and soft.
Top tortilla with a scoop of rice and bean chicken mixture. For some extra flavor, squeeze a bit more lemon juice on top. Wrap up and eat up! 
Variation:
You can use a 12 oz can of chicken instead of cooking your own chicken breast.
You can also cook this up in the microwave if you didn't want to fire up your oven.

Saturday, February 26, 2011

Swedish Tosca Cake

I have mentioned before that my grandmother {or Farmor, as I know her, which means father's mother in Swedish} is from Sweden. However, I don't think I've mentioned that my Farmor loves to cook. The joke in the family is that she reads cookbooks for entertainment. And maybe it's not so much of a joke because she actually does. :) Anyway, she is good cook and I love trying the things she makes for us. She especially loves to make authentic Swedish foods for us and this is one of her favorite things to make.
This cake is delicious. It is the perfect combination of flavors between the glaze and the cake. The cake is dense and moist and the almond flavor is so subtle and perfect. The glaze is sugary and buttery and very sweet, making it the perfect addition to this wonderful cake. 
I don't think you can go wrong with this cake. It is wonderful for a party or a potluck. It is so perfect warm right out of the oven. But it is also yummy if it's been sitting for a couple of days. However, my favorite way to eat it if it has been sitting is to warm it up in the microwave for a few seconds to get the glaze nice and melty and the cake nice and warm. Mmm, mmm. I think I better go make this again. I may or may not eat the whole thing by myself. :D

Ooh, doesn't this just have you drooling?

Swedish Tosca Cake
Recipe from Helga Hardy


Cake:

5 eggs
1-1/2 cup sugar
½ cup butter, melted
2/3 cup milk
1-2/3 cup flour
3 tsp. baking powder
1 tsp. almond extract

Cream eggs and sugar for 5 minutes at medium speed in a mixer or with a handheld mixer. In a separate bowl, mix the flour wiht the baking powder. Add butter, milk, and flour mixture to egg mixture. I found that when adding these ingredients, it is best to add each one individually and just quickly mix them together. If you mix the melted butter and the milk right at the same time, it will make your butter harden. So add the butter, stir it into the eggs and then add the milk and flour mixture. One all added, blend for 2 minutes. Put into 9x9 or 11x7 greased and floured pan {Because the only sized pan I had was an 8x8 that is what I used. I think it made the cake particularly thick and I do think it would be better with the right size pan. However, if you are like me and only have the smaller pan, it does work to use it.}. Bake at 350 F for 45 minutes. 

This photo may not be very good but it is a pretty good shot of the delicious glaze on the top oozing down the cake. This is what happens when you eat it warm. Delicious!
 Glaze:

½ cup butter
1-1/2 Tbsp. milk
1/2 cup sugar
1-1/2 Tbsp. flour
2-1/2 oz chopped almonds
½ tsp. almond extract

Melt butter in saucepan; add milk, sugar, flour and almonds. Boil for 2 minutes - begin timing about as soon as you see bubbles. Since I have a gas burner mine will start a rolling boil pretty quickly once it starts to bubble. If you let it boil too long, it may make it stiff and could burn. I would just start timing it when it begins boiling; don't wait for a rolling boil. Spread over cake; put under the broiler in the oven until is has a light brown color.

Bon appetit!

LinkWithin

Related Posts with Thumbnails