Wednesday, May 30, 2012

Peanut Butter Banana Oatmeal Squares :)

I know, i know.. its Wednesday not Tuesday. I was so busy yesterday I apologize :( but I am here now! Update on the weight loss--- I have lost 10lbs!! :) So i have to lose 10 more in a month to win the competition.... kinda getting nervous! My husband has to lose 9lbs!! This might be a close race!!

I decided I would post a healthy baked treat today since I never post dessert like things!
I got this recipe from http://gingerbreadbagels.com/2011/03/22/peanut-butter-banana-oatmeal-squares/
and she uses this for a breakfast. I feel it can be a good breakfast or a good dessert.

Healthy Peanut Butter Banana Oatmeal Squares!! 

Sorry for the bad pics....   
Ingredients
1 1/2 cups quick cooking oat
1/4 cup packed light brown sugar
1 teaspoon baking powder
1/2 teaspoon kosher salt (i just used sea salt)
1 teaspoon ground cinnamon
1 teaspoon vanilla extract
1/2 cup milk
1 large egg, lightly beaten
1 large mashed banana
1/4 cup creamy peanut butter

Directions
Mix together the quick cooking oats, light brown sugar, baking powder, kosher salt and ground cinnamon.
Add in the vanilla extract, milk and egg. Mix the ingredients together.
Then add in the mashed banana and peanut butter. Combine all of the ingredients.
Pour the mixture into a lightly greased 8 by 8 inch metal baking pan. ( i did mine in a different pan i do not have an 8x8)
Bake at 350 F degrees for 20 minutes.
Cut into squares and enjoy!


As you can see this is a very easy quick thing to make!!


Her blog shows amazing pictures of every step! However the only thing in her picture that was different then how my turned out... is hers look thin and crispy like... however they puff up like brownies or cake. Mine did turn out kind of dry but you can spread a thin layer of peanut butter on the top and drink a glass of a milk with it and they are great!! Plus the bonus of knowing they are not horrible for you!!  ( i apologize for the bad pics)


Enjoy!!!

Tuesday, May 22, 2012

Gouda, Onion Pizza

Hello again! Man Tuesdays sure come quick doing this blog!! Well for today I am posting a pretty easy pizza recipe that I got off of Recipe.com Magazine.

If you are looking for a fun date night idea please check out my other blog tierradawn.blogspot.com and if you happen to draw the letter G you can make this easy, inexpensive meal for dinner!!

Gouda Red Onion Pizza
 
  • 2  Tbsp olive oil
  • 1  large red onion, halved lengthwise and thinly sliced (about 2 cups)
  • 1  Tbsp. snipped fresh thyme or 1 teaspoon dried thyme, crushed
  • 1/4  tsp. salt
  • 1/4  tsp. freshly ground black pepper
  • 1  Tbsp. cornmeal (didnt use this)
  • 1  10- to 13.8-oz. package refrigerated pizza dough (i used a pkged Boboli pizza crust cause we love them)
  • 8  oz. Gouda or Edam cheese, shredded (2 cups) (i used smoked Gouda, ive never cooked or used gouda before.. probably my new favorite!)
     
     Directions
    1. In a large skillet, heat 1 tablespoon oil over medium heat. Add onion. Cook until onion is tender but not brown, stirring often (5 to 7 minutes). Remove from heat. Stir in thyme, salt and black pepper; set aside. (So i was trying just to hurry and so I forgot to saute the onions and just put them on the pizza which turned out good but next time ill saute them!)
    2. Grease a baking sheet and sprinkle with the cornmeal. Pat pizza dough into a 12x8-inch rectangle on the baking sheet. Brush pizza dough with remaining 1 tablespoon oil. Sprinkle pizza dough with cheese to within 1/2 inch of edges. Spoon onion mixture over the cheese.
    3. Bake, uncovered, in a 400 degrees F oven for 12 to 15 minutes or until crust is golden. Cut into 12 pieces. Makes 12 appetizers.
     
    Here is how i did it: ( i have a tendency to take a recipe and totally change it!)
    So I used a Boboli Pizza Crust and I turned my oven onto 375 degrees. While it was heating up I put 2 Tbsp of olive oil on the crust, then I diced about 4-6 cloves of garlic and spread on the crust. I then cut up the red onion and placed it on the pizza. I decided to cut Cherry Tomatoes in half and place on the pizza. I then put the fresh thyme on the pizza. Sprinkled the whole pizza with Salt and Pepper. I sprinkled the Gouda Cheese all over the pizza and baked in the over for about 15 minutes. 
    It was a fabulous pizza and great for left overs. We paired it with a salad with vinaigrette dressing.  (however i forgot to take a picture of that, sorry!)
    Next time I will saute the onions!! 

    Enjoy!!!

Tuesday, May 15, 2012

Quick Easy Tomato Basil Pasta

Hello everyone!!! So i super apologize for not blogging last week. I was extremely busy and just spaced it! So i hope you have all had a great couple of weeks and a great mothers day!! My husband brought home flowers because i am a mom to our dogs! :) He is cute!
So on Saturday the 12th I was in a cooking competition called the Fud Fued and made Thai Chicken Lettuce Wraps. I will give you all the recipe sometime. I entered in the appetizer category and received third place!!! A couple of the judges were The Food Nanny from BYUtv and Judge Jaxon who owns a cooking school in Park City. So it is kind of fun who they get. Last year I made chicken egg rolls and got third place as well. I received some fun prizes that i am excited to use :) All in all it was a fun experience that my husband. mom, step dad, aunt and a couple of friends were able to enjoy with me!
On the weight loss I have lost 6-7 pounds. I need to kick it in gear!!! Yesterday I started noticing where i might be losing weight...... ITS THE LAST PLACE I WANNA LOSE WEIGHT!!...... but oh well.

Anyway on to the recipe for today.... I have made a bunch of recipes in the past few weeks that i am so excited to share with you and some horrible ones i will share so you know not to try them!! But last nights dinner was sooooooo good I couldnt wait till today to blog about it......


Super Quick Tomato Basil Cream Pasta
Serves Two (i always cook way to much pasta so i got enough for 3-4)
1 Large, ripe tomato (2 cups roughly chopped, 1 1/2 cups blended)
1/2 Cup Raw Cashews
1 Tbs Tomato Paste ( i did two TBSP)
1/4 Cup Water

2 Tbs Olive Oil
2-4 Cloves Garlic, minced, optional

6 Ounces (ish) Whole Wheat Spaghetti

1 tsp Salt
2-3 Tbs Wine or Water, optional
1-2 tsp Freshly Cracked, Coarse Black Pepper
1 Large Handful Fresh Basil Leaves, chopped

Put a large pot of salted water on to boil. Once boiling add pasta.
Core the tomato, then roughly chop it. Add it to your blender, seeds, skin and all. Add cashews, tomato paste, and water. Blend until very smooth. (seriously blend for awhile)
Add olive oil to a large saute pan over medium-high heat. Add garlic and saute until golden, being careful not to burn.
Pour sauce from the blender into the saute pan and bring to a simmer.
Add salt and let cook for 4-5 minutes, stirring occasionally.
If desired add wine/water to thin out the sauce. ( i did 3 Tbsp of wine, it cooks out)
Taste and season more if necessary.
Let simmer until pasta is finished cooking. (my pasta was done way before, so i drained it and let it sit)
Once pasta is cooked, drain.
Add pasta to the saute pan with black pepper and freshly chopped basil leaves. Toss to coat. Serve immediately, garnishing with more pepper and basil.
(i added a handful of parmesan cheese :/......)

So i was really nervous with this because my mom and i tried making a tomato basil soup with chopped on almonds and it was just soo chunky we couldnt handle it. So this sauce being made with cashews i was nervous... because even after i blended awhile it was still slightly chunky. WELL, the cooking it 4-5 minutes makes it soft and it was DELICIOUS!! My husband and I both ate it so fast!! 

Just ate the leftovers for lunch and it was soooo delicious!! Im so excited about this recipe!!  

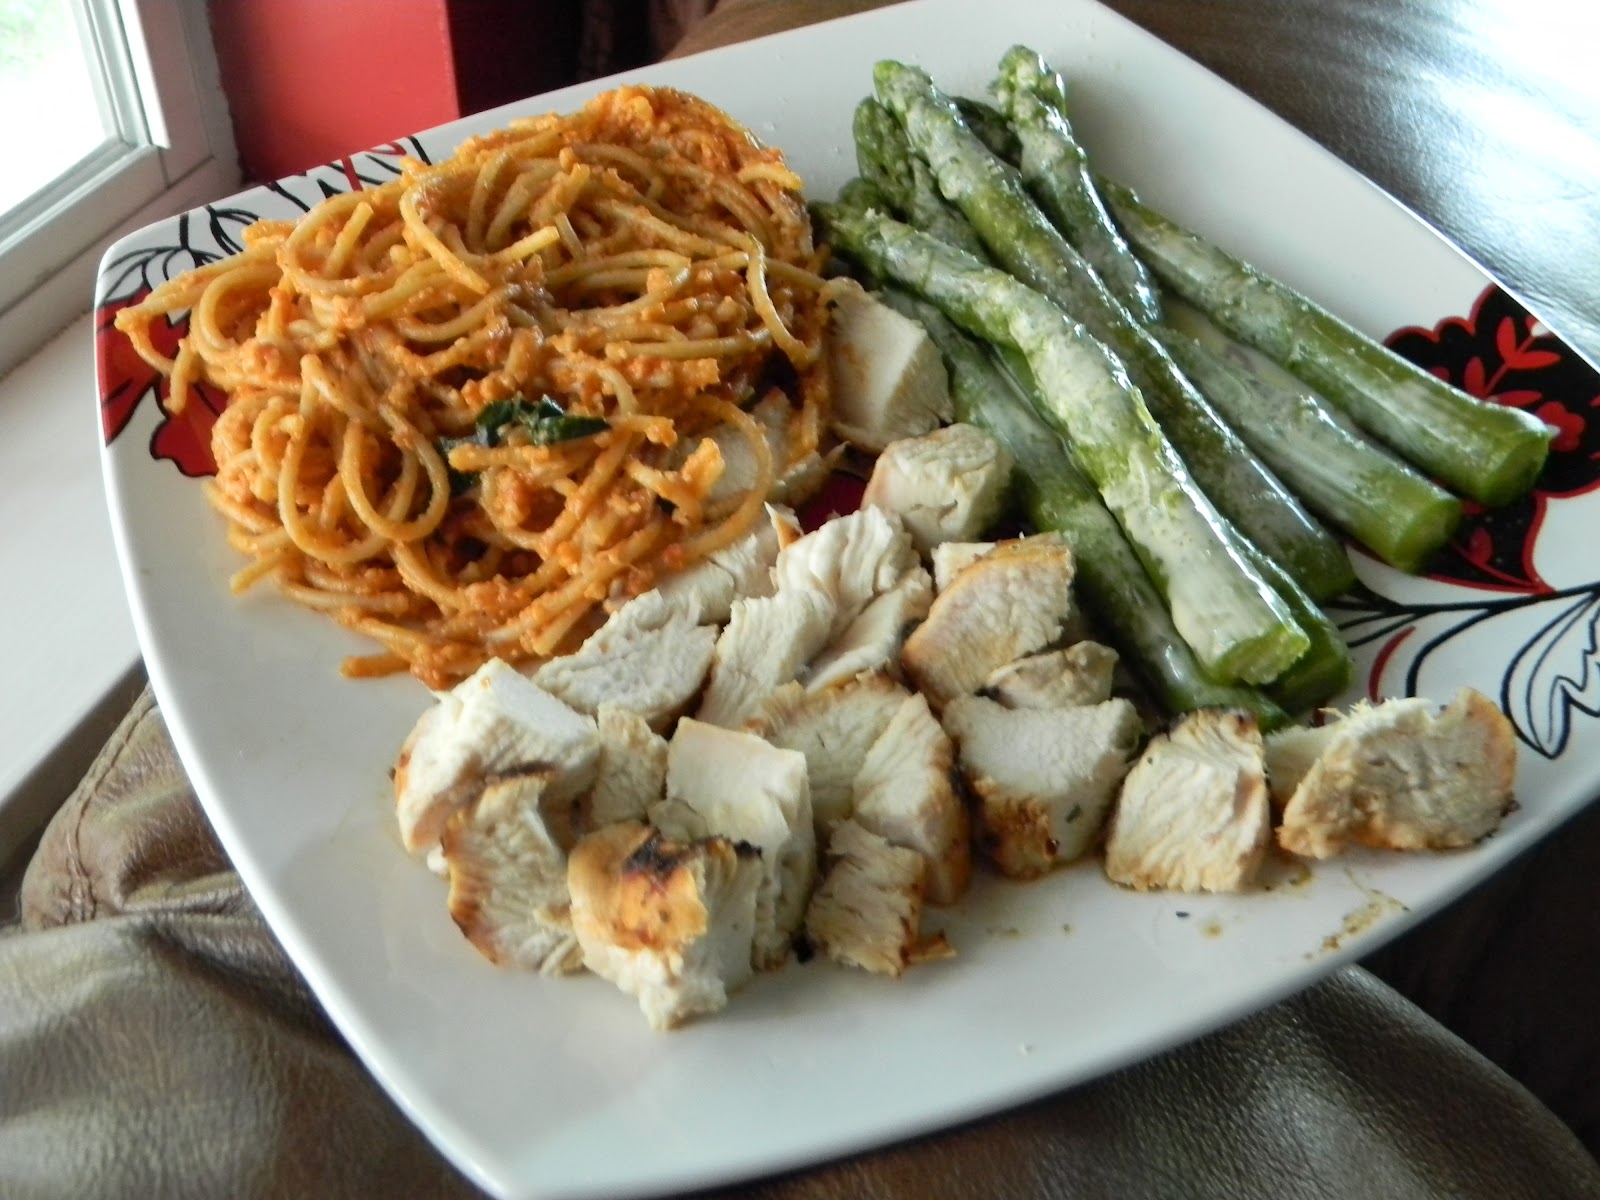
We had ours with chicken that was marinated in a Lawreys Tuscan Dried Tomato Herbs and some Asparagus :)

Tuesday, May 1, 2012

Fruit Salad with a Honey Cinnamon Drizzle!!

Happy Tuesday everyone!! Hope you all had a great week! I went to Idaho and had a great time. Spent Saturday with Jessica! That was fun! For all you Idaho people who know this place we went to Big Judds Saturday night.... (it was my cheat on diet meal, cause i mean come on.. its Big Judds!!) I ate the burger so fast you would have thought its been months since i had a meal!
Anyway I am back to eating healthy and working out :) I told my mom last night that i am officially addicted to working out!! :) Im going every day this week except Friday cause it is date night :)
So i get back from Idaho yesterday and go to work out. Im debating on weighing myself, afraid of what the scale will say.... Well according to that scale Ive lost another pound!! So I have lost about 5-6 lbs now! I was in shock! I called Jessica to inform her that Big Judds didnt ruin everything! She was happy for me.

So for this competition we are all about at a tie right now of a weight loss of around 6lbs! So the pressure is building! Simon asked me last night what if we do not get to 20lb weight loss by July 1st... Im unsure of what we will do with the competition... extend the date? increase the lb limit to lose? I just dont know!

alright alright... I will get to posting a recipe now... Since you have all waited patiently for that delicious looking fruit salad I will post that recipe.

Fruit Salad with a Honey Cinnamon Drizzle


Ingredients
2 cups cantaloupe, chopped
1 cup strawberries, chopped
1 cup blueberries, chopped
2 kiwis, chopped
1 banana, sliced ( I did not put the banana in it. I was afraid if we could not eat it all the banana would go brown.)
1 cup honeydew melon
1 lime, juiced
1 tablespoon honey
1-2 teaspoons poppy seeds
dash of cinnamon (optional)
Directions
Combine cantaloupe, strawberries, blueberries, kiwis and banana in a medium sized serving bowl. Add the honeydew, lime juice and honey to your blender and pulse or purée until smooth.( I was very skeptical of pureeing the honeydew.. but wow!!)
Add poppy seeds and cinnamon and lightly pulse until combined.
Toss dressing with fruit.
Chill for 2 hours before serving.
For just two of us we had a ton left over... Ate it for breakfast the next day and dinner again.
You probably won’t have leftovers, but if you do…
Save them in the fridge for the next morning, and make a fabulous green smoothie! Add a cup of this salad to your blender, along with 2 cups of spinach and 1/2 cup cauliflower (optional). Add 8 oz. water and a few ice cubes. Push the smoothie button and enjoy! ( didnt have the ingredients to try this) 

This was a huge hit with my husband and myself. I am planning to make it for big gatherings and stuff to. Very very good! 


 Hope you all enjoy!! I have been cooking away and have many meals and things to share with you! Cant wait!! 

Tierra 

Tuesday, April 24, 2012

Black Bean Mango Wraps (Tuesday with Tierra)

Well hello everyone!!
So guess what?! I made it to the grocery store and have been making some healthy recipes!!
And..... I have gone down a pant size in my work slacks!! :) :) It can be frustrating because I have not lost much weight (3-4lbs) but yet clothes are fitting better so everyone says i must be losing inches! But how the heck can you lose inches and not weight... it makes no sense to me! The amazing thing is the confidence you gain from working out and just how good it makes you feel!

So the recipe I bring to you today is from mckennagordon.com it is called Black Bean Mango Salsa Wraps.... I have to say eating healthy doesnt mean its gross. Some things i have made i dont love but other things have been fantastic!
well first ill admit mine didnt have mango in it :( we bought some but it was not ripe enough.. i was really sad but we didnt want to go back to the store. (and to be honest we dont know how to tell if mango is ripe)... So here is the recipe....

Black Bean Mango Salsa
Serves 4
299 calories
11g Fat
47g Carbs
7g Protein
8g Fiber
Ingredients
1 avocado
2 limes, juiced (it was wayyy to much lime for me but im wondering if the mango would have been in it if that would have helped)
2 mangos (sadly, didnt have any in mine)
1 can black beans (15 oz)
1/2 cup finely chopped cilantro (i dont like cilantro)
 1 Tbsp extra virgin olive oil
sea salt & fresh ground pepper to taste
Optional ingredients as sides
whole wheat tortillas
 greek yogurt (to spread inside tortilla before filling)
chicken breast (to go inside wrap with filling)      (we did add chicken in ours! YUM)
salsa (for added flavor – inside the wrap or for dipping)
Directions
Cut avocado into cubes. Add to a medium sized mixing bowl and squeeze limes into bowl. Lightly stir to coat avocados in lime juice to keep them from turning brown. Chop mangoes into cubes and add to avocado bowl. Add black beans and cilantro. Drizzle olive oil over contents of bowl and gently stir to combine. Season with salt and pepper to taste. (I did all of this a couple hours before eating to make the flavors blend)
Fill whole wheat tortillas with mixture and serve.
 Optionally, before filling tortillas, spread with greek yogurt, tomato salsa, and/or a layer of chicken breast strips.

I made a delicious fruit salad to go with it that you can see in the pics but you will just have to wait till next week to get it!! Or go to Mckennagordon.com 


 MMM i want to go eat one right now!! and doesnt that fruit look delish!? Just wait till you see what the sauce on it is!! A 100% healthy sauce!! :)

Enjoy! 

Tierra

Tuesday, April 17, 2012

Tuesday With Tierra

Hey Everyone! I know i disappeared forever ago and then Jessica has too. I promise you we have not forgotten about you all!!
My husband and I finally got a PC so now it is much more comfortable for me to use the computer and type then it was on my laptop or cell phone.
Anyway not to disappoint any of you, but I do not have a recipe for this post. I wanted to update you all that we have not just disappeared off the face of the earth and to explain that my posts from here on out (well one can hope) are all going to be healthy recipes.
My husband and parents are on a goal to lose 20lbs by July 1st. They recently built a gym in there basement, so now one must also eat healthier too.
I have already lost about 3-4lbs in 3 weeks. So that is an awesome feeling! I have the ultimate goal of losing 70lbs!!! Wish me luck!!
So I thought I would come post on this blog to let you all know what you should be expected to see from me in the next weeks to come..... (plus kinda adds the pressure knowing people are waiting)

I found this FANTASTIC website called mckennagordon.com and it is all Healthy Recipes that sound amazing! So i have made myself a shopping list and now comes the hard part of getting my butt to the grocery store! (i despise shopping, specially healthy shopping, its expensive!!)
If all goes well and i make it to the store you will all be able to join this journey with me of eating healthy and losing weight.

The recipes I will be making are: Healthy Potato Chips using Sweet Potatoes, Thai Lettuce Wraps using Cauliflower (which im nervous of because im not a fan of cauliflower), Healthy Pasta with a cream sauce, Poppy See Fruit Salad with a Honey Cinnamon Drizzle, Chicken Dijon with a Honey Glaze, Raw Tomato Basil Soup, Black Bean Mango Salsa Wraps, Taco Salad!!! MMmmm my saliva glands are justa pumping!! A few other recipes not from mckennagordon.com will be Coconut Chicken with warm honey mustard vinagrette, Over Night Fridge Berry Oatmeal, Peanut Butter Banana Oatmeal Squares!!

Phew I think im going to be busy in the kitchen!!
So bring on the healthy food, working out, calorie counter app on cell phone!!
Im so excited to have you all join the journey with me!!

See you soon!!

Tierra

Wednesday, February 8, 2012

Chicken and Black Bean Tacos

I almost considered putting "messy" somewhere in the title of this recipe but was a little worried it would scare people away from trying it. ;) They are messy but man are they worth it! These little tacos are deceptively simple and surprisingly delicious. I had tried experimenting with something else and when that didn't really work, I modified it for this recipe instead. So yummy!

Just a note: for this recipe, I used canned Parmesan cheese. Normally I believe in using only freshly grated Parmesan cheese. While that would work for this recipe, there is something about the canned variety that gives it a nice flavor.


Chicken and Black Bean Tacos
Recipe from Cucina di Harwood

2-3 chicken breasts
2-3 cloves garlic, minced
1 can black beans, drained
1 can diced tomatoes {the sweet onion variety is really yummy!}
1 tsp cumin
2 tsp Worcestershire sauce
Canned Parmesan cheese
Shredded cheese
Shredded lettuce
Corn tortillas

Directions:
Cook your chicken breasts, using the skillet method, in 2-3 cloves garlic. When cooked through, shred. Add the beans, tomatoes, cumin and Worcestershire sauce; cook for 5 minutes, uncovered. When ready to serve, sprinkle with canned, grated Parmesan cheese, per your preference. Serve on warmed corn tortillas with shredded cheese and lettuce. Fold in half and eat up!


Tuesday, February 7, 2012

How To: Cook Chicken

A lot of people out there aren't going to need to read this post. If you are one of the people in this world who already has a killer chicken cooking method, please just look through the archives for some other deliciousness or come back tomorrow because I do have a yummy recipe for you then.

Cooking chicken is really a simple thing. However, I have known a lot of people {including myself} who get a little scared with cooking chicken. It is one of those things that you definitely want to be cooked through and in an effort to be sure it's entirely done, it often becomes dry and over-cooked. So I'll share here three methods for cooking chicken that always work for me. Please note that these chicken cooking methods are meant for when you need precooked chicken for a recipe {like the one I'll share tomorrow}. 

The Skillet Method {my personal favorite}:
This is my favorite method because it's fast, it works for me every single time, and it makes the most delicious, moist chicken. Yum! I love it. 
Choose as many chicken breasts {or thighs} as you'll need and that will fit in the skillet you will use. If you use frozen chicken, be sure it is thawed before beginning this method.

You'll need:
Chicken
1 Tbsp oil
1 garlic clove for every chicken breast you are cooking, minced
Salt and pepper to taste
Skillet
Lid to fit said skillet

Pour your oil into the pan and let it get hot {have your temperature set to about medium-low}. If you're not sure the oil is hot, add a small bit of garlic. If it begins to sizzle, the oil is hot. If it just sits there, it needs to be heated a little more. Add the garlic and allow it to sizzle and cook for a few moments - just be careful not to let it burn. Add the chicken and cook it for exactly two minutes. Turn the chicken over and cook the other side for exactly two minutes. {I'm not lying here, people - this works! Exactly two minutes.} At this point, add the salt and pepper to your preference. Now put a lid on that chicken, turn on a timer for  6-8 minutes {the length of time will vary depending on the thickness of your chicken. A thicker breast usually takes closer to 8 minutes. I've also had rather thin fillets finish cooking in 5 minutes, though it has to be pretty thin.} and allow it to cook - no peeking until your timer goes off! When the timer goes off, you can check your chicken to see if it needs more time {I usually just slice open the thickest part of the meat - I'll just be cutting or shredding it anyway so I don't mind if it has a slice through it}. If the juices run clear - as in, they aren't pink at all - your chicken is done. If there is still a little pinkness to the meat or juice, cook it for another minute or two. Voila! Quick, delicious chicken.


Crock Pot Method:
What you'll need:
Chicken
Chicken broth or stock
Seasonings to fit your preference

Place the chicken into your crock pot. Pour chicken broth over the top. It doesn't have to be completely covered in broth but it will need to cover a fair amount of it. Season according to your preference. Cook on low for 6-8 hours or until the chicken is cooked through.

Boiling Method:
I like this method when I need something a little faster than the crock pot method and I still want to cook a lot of chicken {usually with less effort than the skillet method}. 
What you'll need:
Chicken
Water
Chicken Bouillon
Seasonings to fit your preference

Place the chicken in a large stock pot. Add water until the chicken is covered. Add chicken bouillon according to the measurements on the package. {You could also just use chicken broth or stock or plain water. I like the flavor from the broth or bouillon better than just water.} Add the seasonings according to your preference. Heat the water to medium-high and boil slowly for about 30 minutes, or until the chicken is cooked through.

Note: my brother-in-law uses the boiling method when he wants to have barbeque grilled chicken. He gets the chicken cooked up by boiling it and then marinates it in barbeque sauce in the refrigerator, often overnight. Then he puts it on the grill and lets it heat up and get some of the grilled flavor. It's so much faster than barbequing raw chicken and you don't have to worry about whether or not it's cooked. And it still tastes really good!

For each of these methods, you can easily cook the chicken up, shred it and place it in the freezer for quick meals.


I hope these methods are helpful for someone. Please let me know if you have any questions.

Monday, February 6, 2012

7Up Biscuits

When I want a fast, yummy bread-like side for a meal, I make these biscuits. They are so light and airy, a perfect combo with just about any meal. I love how yummy and versatile it is. You could leave out the Italian seasoning for some plain, fluffy biscuits. You could also sprinkle with some cinnamon sugar for a sweeter version. Oh, so good!

7Up Biscuits
Recipe from Your Homebased Mom
Yield: 9-10 good sized biscuits
Takes: 10 -15 minutes, plus baking time


2 C Bisquick
1/2 C sour cream
1/2 C 7-up
1/4 C melted butter
Italian Seasoning

Directions:
Add sour cream into Bisquick and mix together; add 7 Up.  The dough will be very soft. Sprinkle additional Bisquick onto the counter and pour dough onto it. Gently knead a little additional Bisquick into the dough and then pat the dough out to desired thickness (about 1 inch)  Use the bottom of a glass or a biscuit cutter to cut out biscuits. Place melted butter into 9 x 9 pan.  Dip each biscuit in the butter and then turn over and place into the pan {the dipped part should now be on top so it is topped wit butter as well as sitting in it}. Sprinkle with Italian seasoning. Bake in a 450 oven until golden brown, about 8-10 minutes.

Friday, February 3, 2012

Caramelized Brussels Sprouts

I used to think I didn't like Brussels Sprouts. I'm really not a big fan of steamed vegetables. Some people hear that and think I'm nuts. And maybe I am. But I can't help it. I just can't love it. And since that was the only way I had ever been introduced to Brussels sprouts, I didn't think I liked them. However, this recipe is just another example to me of how vegetables can become so tasty if you just prepare them a different way. {I first learned that with asparagus.} We got some Brussels sprouts in our bountiful basket a couple weeks ago and since we really do want to try everything I decided to look up other ways to eat it besides steaming it. And holy moly am I glad I did! I liked these so much, I made them two nights in a row {for those of you who know how much I hate having the same thing two days in a row, you know this is a big deal}. My mouth is watering as I look at all these pictures. I think I need to go make some more.

First, it's a nice, bright green.
Then we'll add some sugar for sweetness.
It begins to add some more golden color.
Caramelized Brussels Sprouts
Recipe from Eat, Live, Run!
serves 2-4 as a side-dish

Time: 20 minutes

12-14 large brussels sprouts
1 tbsp olive oil
1 clove garlic, minced
Shake of kosher salt
2 Tbsp brown sugar
1/4 cup almond slivers, toasted

Directions:
Slice each Brussels sprout very thin until you have a mound of Brussels sprout ribbons. I also made sure to chop up the center part of the sprout really well. It doesn't create "ribbons" like all the leaves of the sprouts and I didn't want huge chunks. So just chop it up, too. Heat the olive oil over medium high in a large skillet and saute the garlic for 30 seconds. Add the Brussels sprouts and continue sauteing for another 4-5 minutes, until bright green and tender. Add the sea salt and brown sugar and toss together. Finish by adding the toasted nuts.

Don't forget the delicious nuts.
Eat up! So yummy!

LinkWithin

Related Posts with Thumbnails