Showing posts with label Summer. Show all posts

Saturday, June 23, 2012

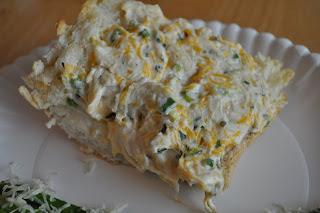
Light and Fluffy No-Bake Cheesecake

My husband recently celebrated a birthday. Birthdays are kind of a big deal to me. I love to go all out for birthdays, have fun traditions and celebrate like crazy. For my husband's birthday, which fell on a weekday this year, I actually got up early and prepared a huge breakfast - and I am talking huge. Pancakes, eggs, bacon, sausage, fruit. Now you all know I love me some breakfast food, but I don't love getting up super early just to prepare it before the day even gets started, so I rarely make breakfast foods for breakfast. But the fact that I prepared a huge breakfast for my hubby for his birthday is pure testament to the fact that I love birthdays -- and that I love my husband, of course. :)

You may have noticed that the title of this post indicated a recipe for cheesecake would be included. And you may be thinking that I also included cheesecake in the lineup of delicious breakfast treats. I didn't, don't worry. But we did have cheesecake for hubby's birthday cake that evening {after we had completely gorged ourselves on Famous Dave's brisket and barbequed chicken - they have an awesome e-mail club and sent us a fantastic "gift" for hubby's birthday. We really enjoyed it! [just a note: Famous Dave's is not promoting this post or blog in any way. They don't really even know I exist. We just like their food and we especially love good deals.] man, I love birthdays!}. I'm not sure how this tradition got started or why, but I always fix a cheesecake of some kind for my hubby's birthday. A few years ago I made White Chocolate Raspberry Cheesecake Bars for his birthday. Last year I made a Double Chocolate Cheesecake {recipe to be posted soon!}. See what I mean? Lots of cheesecake! This year I made what could possibly be his favorite cheesecake ever - a recipe his mom made for them growing up. I'll admit it, I'm a huge baked cheesecake fan, so I don't make this recipe often {in fact, I've only ever made it once before}. But, the hubby loves it and it is a lot easier than a baked cheesecake. Sometimes, even though I love birthdays and love going "all out", I need something a little easy.

This cheesecake is positively light and fluffy. It's perfect for the summer when you want a little something sweet while still keeping cool. It is also perhaps the easiest cheesecake you'll ever make in your life. So do yourself a favor and make it up. :)


Light and Fluffy No-Bake Cheesecake
Recipe from Olive Harwood
Time: approximately 1 - 1 1/2 hours, including refrigeration time
Makes: 12-16 servings, depending on how big you cut your pieces

1 can evaporated milk, chilled in the refrigerator for at least a couple hours {though I just let mine chill overnight}
1 small package lemon Jell-O
1 Tbsp lemon juice
1 cup water
1 pkg cream cheese, softened
1 cup sugar
1 tsp vanilla
16 graham crackers
Topping of choice - options include pie fillings, Danish dessert, or fresh fruit

Directions:
Take your graham crackers and chop them up really fine in a food processor. If you don't have a food processor, put them in a plastic baggie and crush them really good with a rolling pin or something else hard. You want them to be super fine crumbs. This is the crust and large chunks of graham cracker just won't be as good. Once they are chopped up nice and fine, pour them into a 9x13 pan and spread them evenly. Set aside.
Get your cup of water to boiling. Add the lemon jell-o and the lemon juice. Stir until dissolved. Set aside and allow it to begin setting up. You want it to get about to the consistency of egg whites. This takes around 30 minutes, depending on how quickly it cools, but still keep an eye on it. Once it starts to set up, it does so quickly. You won't want it to fully set up because then you'd have to start over. No one wants to have to start over.
Beat the cream cheese, sugar and vanilla until creamy and light.
Whip the cooled evaporated milk until nice and frothy. Add the jell-o and cream cheese mixtures. Beat until fully incorporated and fluffy.
Pour over the graham crackers you placed in your 9x13 pan. Allow to set for 30-60 minutes before topping.

Thursday, June 21, 2012

Lemonade Cheesecake Pie

Remember that sinful, sugary, sweet, delicious goodness I was talking about in my last post? Yes, this is one of those recipes. If you are on a diet, I highly recommend turning away right now because this recipe might just ruin it for you.

 Look away! Quick!

See how beautiful that looks? Ah. Now, if you didn't look away and you are now tempted to trash your diet and make this delicious looking pie, don't say I didn't warn you. ;)


I don't know what it's like in your neck of the woods, but in mine it's starting to get warm. I have to admit that I really love me some dessert. Also, I'm a baker. I love to bake. But in the summer time, turning on my oven usually means adding at least 3-4 degrees of heat to my entire house and when you struggle to keep your house at a liveable, breathable temperature as it is, those extra degrees are not often worth the sacrifice. So I try not to bake in the summertime. But then I get this itch and have a super strong desire to make something, anything, and I have to find some way to fill the baking void that has been made in my life. Desserts like this kind of save me. I can make something and feel fulfilled - and get the dessert I often am sure I desperately need.


Lemonade Cheesecake Pie
Recipe from Kraft

Total time: 10 minutes, plus refrigeration
Makes: 8 servings

1 pkg cream cheese, softened {trust me when I say you won't want reduced fat...your cheesecake will be runny and mushy and not very pretty ... not that I know anything from first hand experience}
1/2 cup thawed frozen lemonade concentrate
1 tub cool whip, thawed and divided
1 graham cracker pie crust
1 1/2 cup fresh berries {I've made this using strawberries and blackberries - just a tip: if using blackberries, you may need more sugar than is listed unless yours are already fairly sweet}
2 Tbsp sugar

Directions:
Beat cream cheese in large bowl with mixer until creamy. Gradually add concentrate, beating well after each addition. Whisk in 2 cups cool whip; spoon into crust.
Refrigerate 4 hours or until firm. Meanwhile, toss berries with sugar. Refrigerate until ready to use.
Pipe or spoon remaining cool whip onto pie in whatever fashion you desire {you'll notice that in my photo I didn't desire any extra cool whip - I don't really think it needs it, but it does make it look prettier if that's what you're going for}. Top with berries.

Monday, June 18, 2012

Black Bean Burgers

Hello everyone! Long time, no see, eh? I know I've been really absent from this little 'ole blog for a long time. For some of that time, I've had what I consider to be a good excuse. A certain little bean kept me sick for awhile! {Well, perhaps I shouldn't say it's our bean's fault because he didn't exactly make me sick but the hormones associated with said bean sure did.} This little bean is totally worth it but I have to admit that it's really nice to like food again. :)


And now I'm back. Hopefully. I have a bunch of recipes to share and post so I'm going to get on it and start them coming. It's a good thing you've had Tierra around to help give you some new ideas! I can't promise that all of my recipes will be health conscious like Tierra's have been. In fact, if eating sugary, delicious food were a sin, some of mine would be downright sinful. But I hope you enjoy them as much as I have.

Today's recipe is actually healthy and so delicious! We love this recipe and it's a really nice substitute for the full of fat hamburgers usually found on a bun. If you're looking for something a little different that tastes so great, give these a try. You won't be sorry. 


Black Bean Burgers
Recipe from Sarah Harwood
Makes 4-6 patties

2 slices stale or toasted whole wheat sandwich bread
1 medium onion, chopped
2 cloves garlic, minced
1 jalapeno pepper, minced, with membranes and seeds removed {I highly recommend wearing rubber gloves when you do this}
1 tsp cumin
1 can black beans, drained and rinsed
1 1/4 cups cooked brown rice
2 tsp fresh lime juice {I admit to liking a little more than that in mine}
1/2 tsp salt
1/2 tsp pepper
1/4 cup chopped cilantro 
Additional breadcrumbs, if needed
1 Tbsp canola or olive oil for cooking


Directions:
In the bowl of a food processor or blender, pulse bread to form breadcrumbs {if you toast it, make sure it's been cooled before processing}. Pour into a bowl and set aside.
Saute onion until soft in a small amount of butter or oil. Add garlic, jalapenos, and cumin and saute for an additional 2 minutes.
Scrape the mixture into the food processor. Add black beans, brown rice, lime juice, salt and pepper. Pulse until the beans are chopped, but not pureed.
Scoop the black bean mixture into a large bowl. Add the breadcrumbs and the cilantro. Using a wooden spoon or your hands, stir the mixture until combined.
Divide the mixture into four or six {depending on the size you like - I usually get about 5} equal portions and form into patties. If the mixture is too moist to form patties, add more breadcrumbs. Place the patties on a baking sheet or plate lined with plastic wrap and cover with additional plastic wrap. Refrigerate for at least 1/2 hour. This recipe could also work well for making ahead of time. You could make it up in the morning and just refrigerate until you need to cook them up that evening.
Heat canola oil in a large skillet set over medium heat. Make sure your oil is hot before adding the burgers. Add the burgers and cook for 4 minutes per side.

Serve with avocado, tomato, lettuce, cilantro-lime mayo {see below} and on a bun.


Cilantro Lime Mayo
1/4 cup mayonnaise
2 tsp fresh lime juice
1/2 tsp ground cumin
2 Tbsp finally chopped cilantro
1/4 tsp freshly ground black pepper

Directions:
In a small bowl, combine all ingredients. Stir well.

Tuesday, May 1, 2012

Fruit Salad with a Honey Cinnamon Drizzle!!

Happy Tuesday everyone!! Hope you all had a great week! I went to Idaho and had a great time. Spent Saturday with Jessica! That was fun! For all you Idaho people who know this place we went to Big Judds Saturday night.... (it was my cheat on diet meal, cause i mean come on.. its Big Judds!!) I ate the burger so fast you would have thought its been months since i had a meal!
Anyway I am back to eating healthy and working out :) I told my mom last night that i am officially addicted to working out!! :) Im going every day this week except Friday cause it is date night :)
So i get back from Idaho yesterday and go to work out. Im debating on weighing myself, afraid of what the scale will say.... Well according to that scale Ive lost another pound!! So I have lost about 5-6 lbs now! I was in shock! I called Jessica to inform her that Big Judds didnt ruin everything! She was happy for me.

So for this competition we are all about at a tie right now of a weight loss of around 6lbs! So the pressure is building! Simon asked me last night what if we do not get to 20lb weight loss by July 1st... Im unsure of what we will do with the competition... extend the date? increase the lb limit to lose? I just dont know!

alright alright... I will get to posting a recipe now... Since you have all waited patiently for that delicious looking fruit salad I will post that recipe.

Fruit Salad with a Honey Cinnamon Drizzle


Ingredients
2 cups cantaloupe, chopped
1 cup strawberries, chopped
1 cup blueberries, chopped
2 kiwis, chopped
1 banana, sliced ( I did not put the banana in it. I was afraid if we could not eat it all the banana would go brown.)
1 cup honeydew melon
1 lime, juiced
1 tablespoon honey
1-2 teaspoons poppy seeds
dash of cinnamon (optional)
Directions
Combine cantaloupe, strawberries, blueberries, kiwis and banana in a medium sized serving bowl. Add the honeydew, lime juice and honey to your blender and pulse or purée until smooth.( I was very skeptical of pureeing the honeydew.. but wow!!)
Add poppy seeds and cinnamon and lightly pulse until combined.
Toss dressing with fruit.
Chill for 2 hours before serving.
For just two of us we had a ton left over... Ate it for breakfast the next day and dinner again.
You probably won’t have leftovers, but if you do…
Save them in the fridge for the next morning, and make a fabulous green smoothie! Add a cup of this salad to your blender, along with 2 cups of spinach and 1/2 cup cauliflower (optional). Add 8 oz. water and a few ice cubes. Push the smoothie button and enjoy! ( didnt have the ingredients to try this) 

This was a huge hit with my husband and myself. I am planning to make it for big gatherings and stuff to. Very very good! 


 Hope you all enjoy!! I have been cooking away and have many meals and things to share with you! Cant wait!! 

Tierra 

Saturday, January 28, 2012

Malibu Chicken Sandwiches

These sandwiches are so incredibly tasty! Oh boy, we really like them. When we had them this last time I asked myself why I don't cook them more often? It's really pretty easy and they are so yummy! If you're not sure you want to go to the trouble of making these, I'll solve the dilemma for you. The answer is yes, you do. :D

I'll share what I do, which is just a little different from the original recipe. This might drive some people crazy but I'm not going to give a lot of exact measurements. The reason is because this recipe is easily adaptable for however ever many chicken sandwiches you want to make. {If you need exact measurements, please check out the original recipe.}


Malibu Chicken Sandwiches
Recipe from Favorite Family Recipes

Chicken breasts {however many you need to feed your clan}
Egg whites {you'll need about one egg white for every two chicken breasts}
Milk {you need 1/2 Tbsp. milk for every egg white}
Italian bread crumbs {you could use unseasoned but Italian is sooooo tasty!}
Ham slices {you need the same number of slices as you have chicken breasts}
Provolone or mozzarella cheese slices {you'll want twice the number of slices as you have chicken breasts}
Equal parts light mayo, mustard and honey - I used 2 Tbsp of each for four sandwiches {if a sweet sauce is just too weird to you, you could leave out the honey - but I'm telling you that you'll be missing something heavenly if you do}
salt and pepper to taste
Rolls, toasted if desired {equal to the number of sandwiches you'll be making}
Lettuce leaves
Avocado slices, optional

Directions:
Preheat oven to 375 degrees.
Line a baking dish {the size will depend on how many chicken breasts you are making} with tin foil and then spray with non-stick cooking spray.
In a shallow dish, whisk together egg whites and milk. Dip each chicken breast in the mixture, then press into the bread crumbs. Heat a little oil in a fry pan and fry each chicken breast just for about 15 seconds on each side.
Place the chicken into your foil lined pan and bake chicken for about 25-30 minutes or until cooked through. 
Remove the chicken from the oven and place one cheese slice on each piece, cover with ham, then top with another cheese slice. Place back in the oven for about 5 minutes or until cheese is melted. Remove from oven. 
While the cheese is melting on the chicken breasts, mix together mayo, mustard, honey and salt and pepper. Just use portions that taste good to you. I did equal amounts of each. {Here's a little tip: use the same measuring device for the mayo, mustard and honey. For example, I used a tablespoon. I used the spoon to just dish out the mayo, then squirted the mustard into it and tapped the spoon on my bowl a few times to get as much of the mustard off as possible. Then I squeezed out some honey onto the same spoon and since it was still coated with a little bit of mustard the honey slid right off. Perfect.} Slice open each roll and spread a little of that delicious mixture on each side of the bread. Add chicken, lettuce and avocado. Serve immediately. Enjoy!

Note: leftovers aren't as good as the day you make these. They still taste okay but certainly aren't as good.

Tuesday, July 19, 2011

Tuesday with Tierra (Pepperoni Pinwheels)

Hello Everyone! What another great Tuesday :D I hope everyone is having a great summer! I havent been doing much, I got a job as I mentioned in previous blogs so therefore I have made myself available all summer.
This blog I decided to do another easy meal.... I know during Summer that sometimes we all get so busy we dont have much time to throw together a dinner. Well this one is a favorite, and after a long 13 hour shift at work its so nice to come home and throw this together.
Pepperoni Pinwheels..basically Pizza Bites! Now i will type the original recipe then in a different color some alterations i did.

Pepperoni Pinwheels
from taste of home best recipes magazine

You will Need:
1/2 C diced Pepperoni (this was not near enough for me, i like pepperoni)
1/2 C shredded mozz cheese (really any kind of cheese works)
1/4 tsp dried oregano
1 egg seperated ( i did the egg thing the first time, kinda stupid. the yolk just kind of makes it so that it stays together.. so the second time i just used marinara sauce. Then sprayed the tops with Pam... works great)
1 tube crescent rolls.

Directions:

1: In a small bow, combine pepperoni, cheese, oregano and egg yolk. In another small bowl, whisk egg white until foamy; set aside. Separate crescent dough into four rectangles ;seal perforations.

2: Spread pepperoni mixture over each rectangle withing 1/4 inch of edges. Roll up like Jelly Roll style , then cut into 4-6 pieces.

3: Place cute side down on greased baking sheets;brush tops with egg white. Bake at 375 degrees for 12-15 minutes or until golden brown. Serve Warm.


Serve with Salad or Pasta! :D

Enjoy!!

Monday, June 20, 2011

Sweet Poppy Seed Dressing

This is the other "element" I added to make our green salads . . . . . . . . . . desirable. I just have to tell you, this dressing is fab. If I do say so myself. I'm a salad lover anyway, but this dressing kept me eating green salad two meals a day for almost a week! It's just that good.

Now, there is actually a funny story to go along with this dressing. This story is my example of how anyone can have kitchen disasters relating to just about anything. This dressing was my kitchen disaster. Silly, I know, but hear me out.

I knew exactly what I was making for dinner. This poppy seed dressing was supposed to go with dinner. It was also supposed to be amazing. I had received a poppy seed dressing recipe for a dear old lady I clean house for. She loves to cook and she is always sharing recipes with me. Actually, if she's made something new and she has leftovers, she'll always heat some up for me when I come cleaning. She's sweet like that. Anyway, she shared this recipe with me with one caveat: she hadn't made it herself. She got it from someone else who said it was just like the local University makes. "Hm, sounds worth trying," I thought to myself. I love the dressing from the school. So I finally pulled the recipe out and whipped it up. It looked a little funny but I just figured I must be remembering wrong. So I gave it a taste. It was honestly the worst dressing I had ever tasted in my life!! Oh dear. Of course, I couldn't blame the little old lady I clean house for. She hasn't even made it for crying out loud! But the ingredients should have been a serious clue to me that something would be wrong. Learn from my mistake - a 1/3 cup sugar will never over power half an onion. I promise. Dressing #1 = down the drain.

So then I looked up some recipes online. I wanted to know where I had gone wrong and hopefully find something that would be better than what I had just made. I figured that couldn't be too hard. I finally settled on a recipe I found and whipped it up. Taste test #2.  It was the second worst dressing I had ever tasted in my life!! Seriously, people. Is there not a good poppy seed dressing out there? Dressing #2 = down the drain.

By this time, my baby was getting impatient about waiting for her dinner. And who could blame her? It was about an hour past when she usually eats dinner. Prepping and whipping up those dressings {plus looking for another recipe} was really taking up some time. This was supposed to be a 15 minute deal, here. *sigh* I hurriedly searched for one final dressing recipe for one last attempt at making what I desperately wanted to be on the kitchen table. I found a recipe. I was instantly unhappy with some of the measurements. I used it as a base and made up my own measurements. I whipped it all up. Taste test #3. Success!!!!

You will never know how happy I was to have a dressing that didn't taste like mustard or onions. Or both. Blech. {Now, I like both mustard and onions, but seriously, when you're looking for a sweet dressing, neither of those ingredients fit the bill.} My hubby came home to an upset baby and no dinner on the table, but his wifey was a happy one. :)


Sweet Poppy Seed Dressing
Adapted by Jessica Harwood

1/3 cup + 2 Tbsp. granulated sugar
5 Tbsp. white vinegar
2 1/2 tsp. poppy seeds
1 tsp grated onion {you want it as small as possible}
3/4 tsp ground mustard
1/2 tsp salt
1/2 cup olive oil

Directions:
In a small bowl, mix the sugar and vinegar together until the sugar was dissolved. Add poppy seeds, onion, ground mustard and salt. Stir well. Slowly add oil. Cover and refrigerate. Serve over green salad with candied almonds, mandarin oranges and mozzarella cheese. Or try on a fruit salad.
Yum!

Candied Almonds

My hubby is not a huge fan of green salad. He enjoys teasing my by calling it rabbit food and pretending to put up a big fuss about eating it. I say pretending because he will eat it and he doesn't complain about too much. He's so amazing about things like that. Eating food he isn't super fond of. What a guy! Anyway, even if he eats it, I know he doesn't love it. Usually I can tell by the portions he eats. Or his willingness to drench it is something non-heart healthy just so he doesn't have to taste the lettuce. Well, okay, he buys low-fat ranch dressing just for that purpose. Apparently the dressing tastes better than the lettuce, though I cannot possibly fathom how that could be the truth. :)

We've been participating in a program called Bountiful Baskets {I think I've mentioned this briefly before}. In almost every single basket there is some kind of lettuce. Even for a salad lover like me, lettuce can get kind of old. So we stopped eating a lot of it . . . . . . . and then we ended up with a lettuce stock pile! Salad is the quickest way I can think of to use it up so we had to have salad. But how to convince the hubby that it really is okay to eat salad every single meal {minus breakfast of course .... I don't think I could do salad for breakfast} for a week? Well, the only thing I could think of was making it different. I'm not always known for my creativity and thus I decided to just add a couple of elements to the typical green salad.

The experiment begins!

And it's a success!

These almonds are so so yummy. In my hubby's own words: "These almonds make the salad edible."

So edible, in fact, I got him to eat salad for his birthday!! It must be good.

Ha! Okay, really, they do add a nice, crunchy sweet bit of deliciousness to your salad. Do you have a hard time getting your fam to eat the greens? Try putting these almonds on and see what it does. Maybe, like my hubby, it will be just the trick. :)


Candied Almonds
Adapted by Jessica Harwood

1/2 cup butter
1 1/4 cup slivered or sliced almonds
5-6 Tbsp granulated sugar {depending on how sweet you want them - I used 6}

Directions:
Preheat oven to 350 degrees. Cover a cookie sheet with aluminum foil. {You can skip that step if you don't mind having dishes to wash. ;) }
Melt butter. Set aside.
In a medium bowl, mix the sugar and almonds together. Pour melted butter over almond mixture.
Spread the nuts on your pan covered with foil. Bake for 12-15 minutes or until slightly golden. Allow the mixture to cool. Break up the nuts and store in a covered container.
Serve over green salad or anything else candied almonds sound good on!


PS - Check back later for the other element I added to my green salad to make it "palatable". :)

Monday, May 23, 2011

Strawberry Sauce

Have you ever heard of Our Best Bites? They are just about the coolest cooking blog on the planet. I aspire to be as cool {and talented} as them someday. I got this wonderful gem of a recipe from their site and it is so wonderful. I use it every time I have leftover strawberries that need to be used. It's is always perfect to use when the strawberries get a little soft and are no longer fun for just eating {or am I the only one who gets that way?}. I have made this several times and every time I am always glad I did. We love it as a syrup on pancakes or french toast, it would be so delicious on ice cream as a topping, and if you come back on Wednesday, I'm going to share my recent favorite thing to do with this sauce.


Strawberry Sauce
Recipe from Our Best Bites

Ingredients
1 pint {or two cups} strawberries
1/3 cup granulated sugar
1 tsp almond extract {which is amazing!} or vanilla extract

Directions:
Wash and remove the stems on the strawberries. I usually cut them in half at this point but according to the girls at Our Best Bites, this is an unnecessary step.
Combine the berries, sugar and desired extract flavor in a medium saucepan. Bring to a simmer over medium heat {as in, don't try to boil it but keep it hot}. Cook for five minutes, stirring and breaking up the strawberries constantly.
After five minutes, remove from heat and allow to cool. When the mixture is cool enough for your blender, add the mixture to your blender and pulse until it reaches the desired consistency. Or don't blend it up and have a syrupy strawberry mixture. Whatever floats your fancy.

This is my new favorite sauce to put on strawberry shortcake. Yummy!
I love leaving it with lots of chunks when I'm going to put it on pancakes or something. So tasty! But I like it smoother if I put it on something like strawberry shortcake or for the "recipe" I'm going to share Wednesday! And don't forget to check back tomorrow for the first recipe from Tierra!

Monday, May 16, 2011

Black Bean and Corn Salad

This salad is absolutely wonderful! It is fresh, cool, and the perfect variation on a "typical" salad. I love salads that are different and I'm glad I've come upon this recipe. I looked for this salad specifically because I had a jicama I needed to use. Have you ever had a jicama? Mm, I love jicama! It is a sweeter vegetable that looks a lot like a turnip and tastes a whole lot better. It is delicious raw and can also be cooked in any dish with other vegetables. A stir fry or fajitas with jicama would be delicious. Just sayin'. It can be a bit starchy; I'm no expert but I'm thinking that it gets starchy quality when it is old. I've linked a video below that you can look into to see how to prepare jicama. In the video you'll be able to see what a jicama looks like {since I forgot to take a picture before I excitedly cut into mine}.


As much as I love jicama raw, I didn't want to just eat the whole thing by itself {it was a large jicima!}, so I decided to put it in a bean and corn salad. I found this recipe on AllRecipes and with just a few modifications, I've got the perfect summer salad.


Black Bean and Corn Salad
Recipe Modified from All Recipes
Ready in 25 minutes
4-5 servings {I think you may be able to get 6 depending on the size of your serving}

Ingredients:
1/4 cup fresh lime juice
1/4 cup olive oil
1 clove garlic, finely minced
1/2 tsp salt
1 (15 ounce) can black beans, rinsed and drained
1 cup frozen corn, thawed
1 bell pepper, green or red, chopped
1 large tomato, chopped
4 green onions, thinly sliced
1 cup jicama, chopped
1 tsp. ground cilantro or 1/4 cup fresh chopped cilantro

Directions:
Place lime juice, olive oil, garlic and salt into a container with a tight lid. Cover with the lid and shake until ingredients are well mixed. Set aside.
In a salad bowl, combine beans, corn, bell pepper, tomato, green onion, jicama and cilantro. Shake the lime dressing once more and pour over the salad. Stir salad to coat all ingredients and serve.
Delicious!
Note: If you want this salad to go further, serve over a bed of lettuce.

PS - check back tomorrow for an introduction to a new contributor to this little 'ole blog! I'm excited to have her cooking along with us!

Wednesday, March 30, 2011

Chicken Salad

I really love chicken salad. It is one of my favorite summer recipes. The combo of sauces, grapes and chicken is magical, I'm tellin' ya! This particular recipe is probably my favorite.


Chicken Salad
Recipe from Budget Bites

2 1/2 cups diced, cooked chicken meat, chilled or 2 12 oz cans of chicken
1 cup chopped celery (optional - I haven't ever used the celery - it's not my fav in this salad)
2 green onions finely diced, use the white and green parts
1 cup sliced, seedless grapes (or apples)
1/2 cup sliced almonds (optional)
2 tablespoons chopped fresh parsley or 2 tsp dried parsley
1 teaspoon salt
2/3 to 3/4 cup cup mayonnaise {note: original recipe calls for 1 cup of mayonnaise but it makes it much too heavy for my taste}
1/4 cup heavy whipping cream

Directions:
In a medium bowl, whip cream to soft peaks. Combine meat, celery, green onion, grapes/apples, almonds, parsley, salt, and mayonnaise with whipped cream. Chill and serve in Pita Pockets or on a croissant roll.
Even though this photo stinks, the salad is really yummy in these Pita Pockets.

Friday, January 14, 2011

Karen's Sloppy Joes

I tend to think that if you are going to make something, homemade is generally better. A few months ago my younger siblings came to visit us and they had lunch. They volunteered to bring sloppy joe mix, but I told them not to worry about it because I had something better than those store bought mixes. When I made up lunch and my sibs finally got to try this recipe, they all agreed that these were the best sloppy joes. It is perhaps the best sloppy joe recipe I've ever had. I have three different recipes for sloppy joes, but this one is probably my favorite. It's also really easy. Ah, you can't beat delicious and easy!

Karen's Sloppy Joes
Recipe from Sister's Cafe

Ingredients:
1 lb ground turkey or lean ground beef (still tastes great with turkey)
1 onion
3/4 c. ketchup
2 T. brown sugar
1.5 T. mustard
1 T. apple cider vinegar
1 T. Worcestershire sauce

Directions:
Chop onion and assemble ingredients. Brown ground turkey/beef in a large frying pan. Add the remainder of the ingredients and mix well. Serve on hamburger bun or whatever you would like. Voila!

Wednesday, November 3, 2010

Hot Hoagies

When I was pregnant, I had a hard time with sandwiches. I'm not a big fan of peanut butter {and it was even more unbearable when I was pregnant} so I usually eat meat sandwiches for lunches. But when you're pregnant you're supposed to stay away from deli meats. Unless you heat them up. But then you have a funny tasting sandwich - hot meat, cool mayo and mustard and pickles and tomato . . . too weird. So I just didn't really eat many sandwiches. And I was sad about that. Because I actually do love a good meat sandwich. Mmm. Anyway, then this recipe fairly fell in my lap and I was a happy camper once again. At least, this was the closest I was going to get to a meat sandwich that wasn't weird for a while.
And you know what? It isn't weird.
It's so tasty that I still keep making it even though I can eat meat sandwiches again.

Now that's saying somethin'.


Hot Hoagies
Recipe from Mel's Kitchen Cafe

1 loaf french bread, cut lengthwise
2 cups cooked, shredded chicken (in a pinch, you can use two large cans chicken breast)
1/2 cup light mayo
1/2 cup reduced fat sour cream
2 green onions, thinly sliced (white and green parts)
1/2 teaspoon garlic salt
1/3 cup fresh parsley, chopped (or 2 tablespoons dried)
2 cups shredded cheese
Olives, chopped (0ptional)

Directions:
Preheat oven to 350 degrees. Place french bread on large baking sheet. Mix all topping ingredients together in a bowl. Spread topping evenly on top of both lengths of french bread. Bake for 15-20 minutes until bubbly and edges are lightly browned. Slice into pieces and serve immediately. Mmm, mmm, tasty!

Saturday, October 23, 2010

Bowtie Chicken Caesar Salad

As promised, here is the recipe to use that delicious Marinated Chicken in. I think this is probably my favorite salad and a perfect summer option {yes, I'm aware that it is no longer summer, but salads can taste good in the fall too!}. 

Bowtie Chicken Caesar Salad
Favorite Family Recipes

1 head Romaine lettuce, chopped
Caesar salad dressing (about 1/4 c., but really it's to taste - I often put in a little more because of the lettuce amount)
Bowtie pasta (cooked to al dente, drained and cooled)
Marinated chicken, cooled and cubed (see link)
Cherry tomatoes (I have used regular tomatoes, diced, and they taste great)
Mushrooms, sliced (I usually just put in a small can if I don't have fresh ones. I actually love the salad without them too)
Olives, sliced (honestly, I've never used these - I don't really think the salad needs them)
Sunflower seeds (optional - never used these either)
Croutons
Parmesan cheese (freshly shredded, of course!)


Directions:
Toss all ingredients together in a large bowl. Top with additional parmesan cheese. Serve immediately.

{Note: I think this salad would also be delicious with other additions: sliced bell peppers, chopped cucumbers, sliced grapes, mandarine oranges}

Wednesday, October 20, 2010

Marinated Chicken

Since discovering this marinated chicken recipe, I just can't get enough of it! The flavors are a perfect combination and the chicken is left so juicy and delicious - it's really impossible to get enough of it! One of these days, I'd really love to taste it grilled, but since we just got our grill and we've only used it once, we haven't tried it grilled yet. It is certainly our favorite marinated chicken recipe and if you'll come back tomorrow, I'll tell you the recipe for my favorite salad recipe to use this chicken with!

Marinated Chicken

4 chicken breasts
1 pkg Good Seasons Italian dressing
1/2 c. olive oil
1/4 c. balsamic vinegar

Directions:
Combine all ingredients in a Ziploc bag. Marinate overnight. Grill or bake at 425 degrees for 20-25 min.

Tuesday, February 23, 2010

Swedish Pancakes

My grandmother is from Sweden and this is one of the most famed recipes she makes from there. We all love it - I could eat them waay too often! It's one of the few foods I don't really tire of having. These pancakes are really similar to crepes, but they are still different. They aren't quite as thin as crepes and I tend to like the flavor of these better {yes, I have had both}. Perhaps I'm biased, but who can tell? ;) Regardless, I don't think you'll be sorry if you make these!

Swedish Pancakes
Helga Hardy
Makes approx. enough for about 3 people if served with something else {hubby and I can eat the whole batch if we don't have anything else with it}

3 eggs
1 (+1/8-1/4) cup milk
1Tbsp. sugar
Sprinkle of salt
1-1/2 cups flour
½ cube of butter

Directions:
Melt butter in frying pan you will use to make the pancakes. Mix all other ingredients together. Add the melted butter to the mixture {batter should be thin but not too thin - if you're familiar with the consistency of crepe batter, it won't be that thin, but it should be thinner than a typical pancake batter}. Pour small amount of batter into pan and spread so thin {I do this by rotating the pan around in a circle - you'll be able to tell if the batter is thin enough if it spreads itself out}. It should look about like this:

Let cook until browned on one side. Flip over.
Serve with powdered or white sugar, any pancake or sandwich topping you prefer, fresh or canned fruit or any other desired ingredient {my grandmother tells me these are really good with veggies but I have yet to try it - I really love the powdered sugar on mine, which, yes, is more like a dessert but I don't care too much about that ... if you can't tell from the photo!}.

Tip: If you wrap the pancakes in a towel they will stay warm while you finish cooking all the pancakes. Simply place one half of a towel on the plate you will use to the put the pancakes and then cover with the other half {my mom started doing this because she couldn't make them fast enough to keep up with how quickly we'd eat them so she started wrapping them in a towel and making everyone wait until she was all finished cooking them - a pretty good idea on her part}.

Wednesday, February 17, 2010

Chocolate Chip Cookies _ 1

This is a pretty basic chocolate chip cookie recipe I got from my mom - but it's a good one. The cookies have a really yummy flavor and they cook up nice and soft, just the way a cookie should be. I like 'em!

Chocolate Chip Cookies
Diane Hardy Makes: 5 dozen cookies

1 cup butter or margarine
½ cup sugar
½ cup packed brown sugar
2 eggs
1 tsp. soda
1 tsp. salt
1 tsp. vanilla
2 cups flour
1-2 cups chips {I've used all flavors of chips as well as M&M's and they turn out great!}
½ cup nuts {optional}

Directions:
Cream together first 7 ingredients. Mix in remaining ingredients. Drop by tsp. full 2 inches apart on a greased cookie sheet. Bake at 375oF for 12-15 minutes or until lightly browned {if you notice your cookies are starting to spread too thin while they are baking - I hate it when that happens! - try adding a bit more flour to the dough so it stays thicker}.

Fun Variation:
Instead of putting in choclate chips or some other such "normal addition", try putting miniature marshmallows and then baking them up. You gotta use a lot of marshmallows or it really doesn't make a difference. It's a really fun twist to the normal cookie - and kids love it {I really loved the way they turned out}!

Tuesday, February 16, 2010

Brownies in a Cloud

WARNING: The richness of these brownies has earned them the name "sinful" among my family for good reasons. Be aware of sudden addictions and disappearing acts when these brownies are made, as well as prepared for more compliments than you dare count.

If you are not a marshmallow fan, these may not be for you. But for everyone else, prepare to be amazed! Even I will eat these and that's saying a lot since I don't like chocolate. The recipe for the brownie is wonderful: perfectly moist but not too cake-y; the marshmallows add that something special that every brownie should have {every brownie should have something special, right?}; and the frosting is the very best frosting ever! I use it all the time because I just love how delicious is turns out each time I make it. Go knock yourself out!


Brownies in a Cloud
Karlene Cobbley
Brownies:
2 cubes softened butter
2 cups sugar
1/3 cup cocoa
4 eggs
1½ cups flour
2 tsp. Vanilla
1 cup nuts {optional - I've never added these and it's a decision I have never regretted}

Directions:
Combine butter, sugar and cocoa; blend till smooth. Add eggs one at a time; mix well. Add flour slowly, beat until smooth, and then add vanilla. Pour in a greased 9x13 pan. Bake @ 350o for 30 minutes.

Clouds:
While brownies are still hot {before taking them out of the oven}, cover with miniature marshmallows {don't be shy about that covering bit either - go ahead and dump bunches of marshmallows on there} and bake until they are light brown or melted {about 3 minutes}. Let cool completely.

Frosting:
Combine all together and beat until smooth

2 cups powdered sugar
1½ - 2 Tbsp Cocoa
½ cube soft butter
¼ cup milk

Monday, February 15, 2010

Macaroni and Cheese _ 1

This is pretty good macaroni cheese recipe, though I'm still in search of that perfect recipe. We like our macaroni and cheese to be cheesy and creamy, but I'm not a fan of Velveeta {or some other such processed cheese}, which seems to be the best way to get really creamy macaroni and cheese. This recipe really is pretty good, though I don't recommend using the onions and it really should be served right away as that is when it tastes the very best. It is really quite creamy & delicious though the cheese flavor isn't the strongest - but if you want a fairly quick, creamy homemade macaroni and cheese dish, this is it.


Macaroni and Cheese _ 1
Recipe inspiration & some directions/measurements came from Family Dinners by Janet Peterson.

2 Tbsp. butter or margarine
2 Tbsp. flour
1/2 tsp. salt
1/4 tsp. pepper
2 cups milk
2-3 cups grated cheddar cheese {can use another variety if desired}
1 package pasta {I probably used around 9-10 ounces; I just cooked up a bunch of pasta and added until I felt there was a good ratio and used the leftover pasta with spaghetti sauce}
1/4-1/2 cup chopped onion or 1 1/2 Tbsp. dried minced onion {optional; we used this and didn't really like the flavor it added so we probably won't do it again}
1/2-3/4 cup sour cream

Directions:
Melt butter in a large saucepan {saute your onion at this point if you are going to use it}. Stir in flour, salt and pepper and cook for about 1 minute {it's best if you have all these ingredients measured out and ready - once you put the flour in the cooking goes quickly and you'll want to stir the flour frequently so it doesn't burn}. Add milk; cook and stir over medium heat until slightly thickened {add up to 1 Tbsp more flour if the milk isn't thickening enough & be sure to stir frequently or the milk will burn on the bottom of the pan}. Add cheese and sour cream stirring until melted. Stir in the pasta. Serve immediately.

Variation:
Transfer the pasta/sauce mixture to a baking dish and sprinkle with bread crumbs. Bake, uncovered, at 350 degrees F for 25-30 minutes or until slightly browned and bubbly. {I recommend using slightly less pasta so there will appear to be excess sauce - if you don't do this your macaroni will end up being kind of dry and it won't be creamy anymore.}

Optional Ingredients:
1 tsp. dry mustard or 1-2 tsp Dijon mustard
1 package {8 oz} cream cheese
1/2 cup cottage cheese
1/3 cup fine bread crumbs

LinkWithin

Related Posts with Thumbnails