Showing posts with label Baking. Show all posts

Wednesday, May 30, 2012

Peanut Butter Banana Oatmeal Squares :)

I know, i know.. its Wednesday not Tuesday. I was so busy yesterday I apologize :( but I am here now! Update on the weight loss--- I have lost 10lbs!! :) So i have to lose 10 more in a month to win the competition.... kinda getting nervous! My husband has to lose 9lbs!! This might be a close race!!

I decided I would post a healthy baked treat today since I never post dessert like things!
I got this recipe from http://gingerbreadbagels.com/2011/03/22/peanut-butter-banana-oatmeal-squares/
and she uses this for a breakfast. I feel it can be a good breakfast or a good dessert.

Healthy Peanut Butter Banana Oatmeal Squares!! 

Sorry for the bad pics....   
Ingredients
1 1/2 cups quick cooking oat
1/4 cup packed light brown sugar
1 teaspoon baking powder
1/2 teaspoon kosher salt (i just used sea salt)
1 teaspoon ground cinnamon
1 teaspoon vanilla extract
1/2 cup milk
1 large egg, lightly beaten
1 large mashed banana
1/4 cup creamy peanut butter

Directions
Mix together the quick cooking oats, light brown sugar, baking powder, kosher salt and ground cinnamon.
Add in the vanilla extract, milk and egg. Mix the ingredients together.
Then add in the mashed banana and peanut butter. Combine all of the ingredients.
Pour the mixture into a lightly greased 8 by 8 inch metal baking pan. ( i did mine in a different pan i do not have an 8x8)
Bake at 350 F degrees for 20 minutes.
Cut into squares and enjoy!


As you can see this is a very easy quick thing to make!!


Her blog shows amazing pictures of every step! However the only thing in her picture that was different then how my turned out... is hers look thin and crispy like... however they puff up like brownies or cake. Mine did turn out kind of dry but you can spread a thin layer of peanut butter on the top and drink a glass of a milk with it and they are great!! Plus the bonus of knowing they are not horrible for you!!  ( i apologize for the bad pics)


Enjoy!!!

Tuesday, May 22, 2012

Gouda, Onion Pizza

Hello again! Man Tuesdays sure come quick doing this blog!! Well for today I am posting a pretty easy pizza recipe that I got off of Recipe.com Magazine.

If you are looking for a fun date night idea please check out my other blog tierradawn.blogspot.com and if you happen to draw the letter G you can make this easy, inexpensive meal for dinner!!

Gouda Red Onion Pizza
 
  • 2  Tbsp olive oil
  • 1  large red onion, halved lengthwise and thinly sliced (about 2 cups)
  • 1  Tbsp. snipped fresh thyme or 1 teaspoon dried thyme, crushed
  • 1/4  tsp. salt
  • 1/4  tsp. freshly ground black pepper
  • 1  Tbsp. cornmeal (didnt use this)
  • 1  10- to 13.8-oz. package refrigerated pizza dough (i used a pkged Boboli pizza crust cause we love them)
  • 8  oz. Gouda or Edam cheese, shredded (2 cups) (i used smoked Gouda, ive never cooked or used gouda before.. probably my new favorite!)
     
     Directions
    1. In a large skillet, heat 1 tablespoon oil over medium heat. Add onion. Cook until onion is tender but not brown, stirring often (5 to 7 minutes). Remove from heat. Stir in thyme, salt and black pepper; set aside. (So i was trying just to hurry and so I forgot to saute the onions and just put them on the pizza which turned out good but next time ill saute them!)
    2. Grease a baking sheet and sprinkle with the cornmeal. Pat pizza dough into a 12x8-inch rectangle on the baking sheet. Brush pizza dough with remaining 1 tablespoon oil. Sprinkle pizza dough with cheese to within 1/2 inch of edges. Spoon onion mixture over the cheese.
    3. Bake, uncovered, in a 400 degrees F oven for 12 to 15 minutes or until crust is golden. Cut into 12 pieces. Makes 12 appetizers.
     
    Here is how i did it: ( i have a tendency to take a recipe and totally change it!)
    So I used a Boboli Pizza Crust and I turned my oven onto 375 degrees. While it was heating up I put 2 Tbsp of olive oil on the crust, then I diced about 4-6 cloves of garlic and spread on the crust. I then cut up the red onion and placed it on the pizza. I decided to cut Cherry Tomatoes in half and place on the pizza. I then put the fresh thyme on the pizza. Sprinkled the whole pizza with Salt and Pepper. I sprinkled the Gouda Cheese all over the pizza and baked in the over for about 15 minutes. 
    It was a fabulous pizza and great for left overs. We paired it with a salad with vinaigrette dressing.  (however i forgot to take a picture of that, sorry!)
    Next time I will saute the onions!! 

    Enjoy!!!

Monday, February 6, 2012

7Up Biscuits

When I want a fast, yummy bread-like side for a meal, I make these biscuits. They are so light and airy, a perfect combo with just about any meal. I love how yummy and versatile it is. You could leave out the Italian seasoning for some plain, fluffy biscuits. You could also sprinkle with some cinnamon sugar for a sweeter version. Oh, so good!

7Up Biscuits
Recipe from Your Homebased Mom
Yield: 9-10 good sized biscuits
Takes: 10 -15 minutes, plus baking time


2 C Bisquick
1/2 C sour cream
1/2 C 7-up
1/4 C melted butter
Italian Seasoning

Directions:
Add sour cream into Bisquick and mix together; add 7 Up.  The dough will be very soft. Sprinkle additional Bisquick onto the counter and pour dough onto it. Gently knead a little additional Bisquick into the dough and then pat the dough out to desired thickness (about 1 inch)  Use the bottom of a glass or a biscuit cutter to cut out biscuits. Place melted butter into 9 x 9 pan.  Dip each biscuit in the butter and then turn over and place into the pan {the dipped part should now be on top so it is topped wit butter as well as sitting in it}. Sprinkle with Italian seasoning. Bake in a 450 oven until golden brown, about 8-10 minutes.

Wednesday, February 1, 2012

Strawberry & Cream Cheese Stuffed French Toast

This is the best stuffed French toast I've ever had. I'm rarely a fan because the toast is just soggy and mushy - so not good. But this stuff was good. It was tender inside {without being mushy}, had a nice crunch from baking and the caramel-y crunchy stuff on the bottom? Delicious! We made this for one of our mornings watching General Conference last October. It may just become a conference tradition.


Strawberry & Cream Cheese Stuffed French Toast
Recipe from Jamie Cooks It Up!
Time: 20 minutes prep + overnight refrigeration then 60-90 minutes baking
Yield: 10 servings

1 loaf french bread
1/2 C melted butter
3/4 C brown sugar
1/2 C corn syrup

8  oz cream cheese
1 egg
1/3 C sugar
1/2 C strawberry jam

8 eggs
1 C milk
cinnamon

Fresh Strawberries
Powdered sugar
1. Combine the butter, brown sugar and corn syrup.
2. Slice up your bread. You want the pieces to be about 1/2 inch thick.
3. Spray a 9x13 pan with cooking spray. Pour the butter/brown sugar mixture in the bottom of the pan.
4. Smooth it all out, so it covers the bottom entirely.
5. Lay your slices of bread on top of the buttery brown sugar. I had to cut some of my slices in half, still turned out great! You can have them touch each other, just not overlap.
6. In a separate bowl combine the cream cheese, egg, sugar and strawberry jam. Beat with hand held beaters (or in your stand mixer) until nice and smooth. Pour it right over the top of the bread.
7. Layer more bread over the top of the cream cheese filling.
8. In another bowl (ok, this takes a lot of bowls!) combine the 8 eggs and 1 C of milk. Whisk them around until well combined. Pour over the top of the bread.
9. Sprinkle the top of the bread with some cinnamon.
10. Cover and refrigerate overnight.
11. Bake in the morning at 350. Depending on how quickly your oven cooks, and how cold you keep your fridge you will need to bake it for 1 to 1 1/2 hours. It needs to soak up all of the egg and milk juice, and have time to caramelize along the bottom. Take the foil off for the last 15 minutes of cooking.
12. Serve with fresh strawberries and powdered sugar. You can also use frozen strawberries. This is the middle of the winter after all! Just be sure they have had a chance to thaw.
Enjoy!

Monday, December 19, 2011

Holiday Sugar Rush: Vanilla Butterfinger Cupcakes

This is the very last sugar rush recipe I'm going to post. I don't know about you, but that is probably enough sugar for me!

I've saved something pretty fantastic for the last sugar rush recipe, though. These cupcakes are deliciously  good. Seriously. Amazingly. Wonderfully. Yummy. They are also pretty easy. I made them up after a whirlwind all-day-long baking day. We were supposed to take a dessert to my husband's work Christmas party and we had to be there in two hours, plus still make sure our little one got dinner and put to bed before we left. I was able to pull it off because these cupcakes were so easy. And I believe they earned four stars from the reviews everyone sitting at our table gave me. Easy and delicious. That's good enough in my book.


Vanilla Butterfinger Cupcakes
Recipe from Your Cup of Cake
Makes: 24 cupcakes

1 box vanilla cake mix with pudding in the mix
1 1/2 tsp cinnamon
2 Tbsp oil
2 egg whites + 1 whole egg
1 cup buttermilk {see note below}
1/2 cup sour cream
1 tsp vanilla

Directions:
Preheat oven to 350 and line two cupcake pans with liners.
In a small bowl, sift the cake mix to remove any lumps. Add cinnamon and stir. Set aside.
In a large bowl, combine egg whites, whole egg, and oil together. Mix just until combined - you don't want to over beat it.
Add buttermilk, sour cream and vanilla to egg mixture and stir to combine.
Slowly add cake mix to egg mixture and stir just until cake mix is entirely moistened.
Fill cupcake liners 3/4 full and bake for 15-17 minutes or until a knife inserted in the center comes out clean. Cool in the pan. 


Vanilla Butterfinger Buttercream:
3/4 cup {1 1/2 sticks} of salted butter, softened {you can use unsalted but I prefer the flavor of salted}
1/3 cup smooth peanut butter
1 tsp vanilla
3-4 cups powdered sugar
1/4 cup sour cream
2 crushed Butterfinger bars

Directions:
Beat butter and peanut butter on high for 3 minutes, scraping bowl as necessary. Add vanilla and add powdered sugar 1/2 cup at a time, beating after each addition,  until it reaches desired consistency. Add sour cream and mix well. Add more powdered sugar if needed then stir in the crushed Butterfinger pieces.
Pipe onto cooled cupcakes and top with additional crushed Butterfinger pieces. Ta-da! Some delicious cake.


Sunday, December 18, 2011

Holiday Sugar Rush: Andes Mint Cookies

Our sister-in-law made them once for a family function and they were gone so quickly I never even got the chance to try them! My husband told me they were really good so I figured I'd better make some and see for myself. When I asked for the recipe, she told me I could find it on a back of Andes Creme de Menthe baking chips. When I finally found some chips and tried the recipe for myself, I found that everyone was right. These cookies are positively delicious! I have only ever found the baking chips during the holiday season so when I see them I stock up on a few bags to have throughout the year. Because let's be honest, Andes mints are the best. {No, they aren't paying me to say that. I just really really love their mints!} I always get excited when the holidays come around because I see the baking chips coming out again and I dream about making these delicious cookies. Well, okay, I get excited about the holidays for other reasons, too.

Andes Creme de Menthe Chunk Cookies
Recipe from Andes
Makes approx 4 dozen cookies

1/2 cup butter, softened
3/4 cup brown sugar {dark is best, though I have used regular before}
1/2 cup granulated sugar
1 tsp baking soda
1 tsp baking powder
2 tsp vanilla
2 eggs
1 package {10 oz} Andes Creme de Menthe Baking Chips
2 2/3 cup flour, sifted

Directions:
Blend butter, sugars, baking soda, baking powder, vanilla and eggs until mixed. Stir in Andes Baking Chips and then add flour. Chill approximately one hour in refrigerator before baking.
Once dough has been chilled, heat oven to 350 degrees. After chilling, form the cold dough into 1-inch balls and flatten slightly. Raise oven rack one level above middle and bake on non-stick baking pans or pans that have been lightly greased.
Bake at 350 degrees for 8-10 minutes. Cool on pans for two minutes before removing.

Holiday Sugar Rush: Ginger Cranberry Shortbread Wedges

Can you believe that this shortbread was my introductory foray into the world of ginger? I believe I am quite the fan. The combination of ginger and cranberries with the delicious flavor of shortbread makes these cookies perfect for the holidays.
Ginger-Cranberry Shortbread Wedges
Recipe from Betty Crocker Cookies
Makes approx. 16 cookies

2/3 cup butter or margarine, softened
1/3 cup powdered sugar
3 Tbsp finely chopped crystallized ginger {I found mine in the bulk section of Winco though I'm sure you can find it near the spices in any grocery store}
1 1/3 cups flour
1/2 cup dried cranberries, chopped {I used craisins and it worked out fine}
2 tsp granulated sugar

Directions:
Preheat oven to 350.
In a large bowl, mix butter, powdered sugar and ginger until fully incorporated. Stir in the flour and cranberries.
Form the dough into a rough disk shape. On an ungreased cookie sheet, pat the dough down into a 9-inch circle. Shortbread doesn't really change much when it's baking so remember that the thickness of the dough is about what the thickness of your cookie will be. Sprinkle with granulated sugar.
Bake for 18-20 minutes or until golden brown. Cool for 10 minutes before cutting. Cut into 16 wedges.


Saturday, December 17, 2011

Holiday Sugar Rush: Caramel & Heath Bar Cupcakes

These cupcakes are deliciously moist and caramel-y. If you have an event you want to take cupcakes to, you can't go wrong with these. Yum!
Note: All cupcake flags and toppers were made using Stampin' Up stamping sets and ink colors.

Caramel and Heath Bar Cupcakes


Chocolate Cupcakes:
Recipe from Your Cup of Cake
¾ cup buttermilk
½ cup oil
3 eggs
1 teaspoon vanilla extract
1 cup sour cream
1 box Devil’s Food Cake Mix
2 Heath Bars, crushed 

Directions:
Preheat oven to 350 degrees and line 2 muffin tins with 24 cupcake liners.
Combine buttermilk, oil, eggs and vanilla.
Sift in (for easy mixing) cake mix and add sour cream. Stir in the heath bars.
Fill liners ¾ full and bake for 18-22 minutes or until an inserted knife comes out clean. Cool in the pan.

Vanilla Buttercream Frosting

Caramel Sauce

You'll also need Heath Bars, broken into bits or a bag of broken toffee bits


Once cupcakes have cooled and frosting and caramel sauce have been prepared, put the caramel sauce into a squeeze bottle. Poke the tip of the squeeze bottle into the cupcakes and squeeze in caramel sauce until the cupcake begins to expand. Go ahead and poke and fill each cupcake a couple times until all the caramel sauce has been used.
Once you've filled all the cupcakes with caramel sauce, pipe the buttercream frosting onto them. Top with crushed Heath bars.

Friday, December 16, 2011

Holiday Sugar Rush: Double Chocolate Cherry Cookies

My hubby is a pretty big fan of cherry. These cookies were a little too chocolatey for me, but I think they were a hit with my hubby and his littlest fan, our daughter.

Double Chocolate Cherry Cookies
Recipe adapted slightly from Betty Crocker Cookies
Makes about 4 dozen

1 1/4 cup granulated sugar
1 cup margarine, softened
1/4 milk, room temperature
1/2 tsp almond extract
1 egg
1 3/4 cup flour
1/3 cup unsweetened baking cocoa
1/2 tsp baking soda
1 cup quick-cooking oats
1 cup semisweet chocolate chips
1 cup dried, chopped cherries

Directions:
Preheat oven to 350.
In a large bowl, beat sugar, butter, milk, almond extract and egg with an electric mixer or spoon until smooth. In a separate bowl, whisk together the flour, soda and coca. Add to the butter/sugar mixture. Stir in the remaining ingredients until incorporated. On an ungreased cookie sheet, drop dough by tablespoonfuls about 2 inches apart.
Bake 8-10 minutes or until almost no indentation remains when touched lightly in the center and surface is no longer shiny. Immediately remove to a cooling rack. Store in an airtight container.

Holiday Sugar Rush: Lemon Bars

I've mentioned before that I've been looking for the perfect lemon bar. I was having a hard time finding it. So I finally just started combining and tweaking recipes until I came up with what made me happy. These bars make me happy. I like them slightly chilled, though not completely cold.


Delicious Lemon Bars

Crust:
1 cup butter, cold and cut into small squares
1 3/4 cup flour
2/3 cup powdered sugar
1/4 tsp salt

Preheat oven to 350.
Grease and flour a 9x13 pan.
In a medium bowl, whisk together dry ingredients. Add the butter and cut into the other dry ingredients until well combined and crumbly in appearance. Press mixture firmly and evenly into the bottom of the pan and up the sides slightly.
Bake for 17-20 minutes or until slightly golden.

Topping:
1 1/2 cup granulated sugar
3 Tbsp flour
1 tsp baking powder
2 1/2 tsp lemon zest
4 eggs, slightly beaten
1/2 cup fresh squeezed lemon juice {you can use the stuff that comes in a bottle but fresh is better}


Whisk together all dry ingredients and lemon zest. Add the eggs and lemon juice and mix well.
Pour on top of the warm crust and bake for 20-25 minutes, or until the topping has set and browned. Cool.
Once cooled, sprinkle the top with additional powdered sugar.
Store tightly closed in the refrigerator.

Thursday, December 15, 2011

Holiday Sugar Rush: White Chocolate and Craisin Cookies

These cookies are so soft. Somewhat surprising based on how they always look when they are finished, but they really do stay so soft. They also keep well in the freezer so bake up a batch and hide em where no one will see so you can snitch a cookie whenever you feel like it put them in the freezer to save for later.

White Chocolate and Craisin Cookies
Recipe adapted from Jacobs, Powell and Harris

1 cup shortening {butter flavor is best}
3/4 cup granulated sugar
3/4 cup brown sugar
2 eggs
1 1/2 tsp vanilla
2 1/2 cups flour
1 tsp baking soda
1 tsp salt
1 cup white chocolate chips
1 cup craisins

Directions:
Preheat oven to 375.
Cream shortening and sugars together for 2-3 minutes or until it is light and fluffy. Add eggs one at a time and mix well after each addition; add vanilla.
In a separate bowl, whisk together the dry ingredients. Set aside.
Add the white chocolate chips and craisins to the wet mixture. Stir in the dry ingredients just until fully incorporated. Be careful not to over mix. If the dough is still really wet, add a couple more tablespoons  of flour.
Drop by teaspoon full onto an ungreased cookie sheet. Bake for 6-8 minutes. Take out when the cookies still look just a little raw. Leave on the cookie sheet for 2-3 minutes to finish baking. Remove to a cooling rack and allow to cool completely. Store in an airtight container.

Wednesday, December 14, 2011

Holiday Sugar Rush: Homemade Oreos

Since we're already on a cake mix cookie kick, we'll just keep up the trend, at least for another recipe. Everyone probably has a recipe for these. Or at least everyone has tasted them before. Nothing can compare to a soft, homemade Oreo cookie. This is the way I've been making these for years. They always turn out so chewy and delicious. I love making them small to get some tasty little bites of Oreo. It's the way to do it. :)


Soft Homemade Oreos

1 chocolate cake mix {I like German chocolate, but devil's food is pretty good, too}
3/4 cup {1 1/2 sticks} melted butter
2 large eggs

Directions:
Preheat oven to 350.
Mix all ingredients together until cake mix is completely moistened. Refrigerate for 10-15 minutes or until firm. Form the dough into walnut size {or smaller if you are like me and like small little Oreos} balls. Place on ungreased cookie sheet two inches apart and bake for 6-8 minutes. They may not look quite done when you take them out - they'll still be just a little raw. Leave them on the sheet for a couple of minutes before transferring them to a cooling rack. This helps make sure you get soft, chewy cookies.


Oreo Frosting:

4 oz cream cheese {half 8oz package}, softened
1/4 cup {1/2 stick} butter, softened
1 tsp vanilla
1 lb {between 3-4 cups} powdered sugar

Directions:
Place the cream cheese, butter, vanilla, and two cups powdered sugar in a bowl. Mix together until smooth. Continue adding powdered sugar 1/2 at a time until you get the consistency you want.

And then comes the tricky part:
Assemble Oreos by spreading frosting on one cookie and topping with another. Delicious!

If you want to make these even more festive, you could add some peppermint or mint extract to the frosting. Add it with the vanilla - put between 1/2 and 1 tsp, depending on your preference.
You could also add some finely crushed peppermint before spreading onto the cookies.
Another yummy option would be adding a few teaspoons of orange zest & freshly squeezed juice to the frosting before spreading. Yum!

Holiday Sugar Rush: Three Ingredient Pumpkin Cookies

The holidays always need a little spice with all the sugar, right? These three ingredient pumpkin are a big hit. I made this for my sister's baby shower and everyone loved them. My cousin even said they were just as good as her mom's more involved and difficult-to-make pumpkin cookies. 


Three Ingredient Pumpkin Cookies
Recipe from Nina Wilkins

1 spice cake mix, sifted
1 14 oz can pumpkin pie filling
1 12 oz bag chocolate or cinnamon chips

Mix pumpkin filling and cake mix together until cake mix is completely mixed in. Add the chocolate chips. Drop by spoonfuls onto greased cookie sheet. Bake at 350 for 6-9 minutes, or until set and slightly browned. Cool for a couple of minutes on the cookie sheet before transferring to wire racks.

Tuesday, December 13, 2011

Holiday Sugar Rush: Fudge Crinkle Cookies

Fudge Crinkle Cookies
Recipe from Betty Crocker Cookies

Makes: approx 2 1/2 dozen cookies

1 box devil's food cake mix {a mix with pudding is the best}
1/2 cup butter, melted
2 eggs
1 tsp vanilla
1/3 cup powdered sugar

Directions:
Preheat oven to 350 degrees.
In a large bowl, mix cake mix, oil, eggs and vanilla with a spoon until a dough forms.
This next step is easier if you refrigerate your dough for about 15 minutes, but it isn't absolutely necessary.
Shape dough into 1-inch balls. Roll balls in the powdered sugar. Place balls about 2 inches apart on an ungreased cookie sheet.
Bake 10-12 minutes, or until set. Allow to finish setting up on the cookie sheet for one minute, then remove to a cooling rack. Cool completely, about 30 minutes. Store tightly covered.

Monday, December 12, 2011

Holiday Sugar Rush: Peanut Butter Cookies

This is a little series I'm going to call Holiday Sugar Rush. Christmas is always the time for some extra goodies, right? So I hope you're all ready for some whirlwind goodie posting! I've got lots of recipes to share {and I'm a little behind getting started}. Enjoy the sugar rush! 

This is quite possibly one of the best peanut butter cookie recipes I've ever made. They cook up nice and soft and stay that way for several days {which is amazing for peanut butter cookies}. The flavor is fantastic. I've been making these for years and haven't found any other peanut butter cookie to take it's place.

I know the photos aren't the greatest. Please don't judge me. Things were pretty crazy so I did what I could.
Peanut Butter Cookies

1 cup butter
2 eggs
1 tsp. vanilla
1 cup peanut butter
1 cup granulated sugar
1 cup brown sugar
1-1/2 tsp. soda
2-1/2 cup flour
½ tsp. salt
Extra granulated sugar

Directions:
Cream together butter, peanut butter, eggs and vanilla. Add the sugars and mix well. In a separate bowl, mix together the flower, baking soda and salt {this helps make sure your baking soda and salt are fully mixed}; add to the rest and mix until incorporated. Roll into balls and roll into the extra white sugar. Press down with a fork in a crisscross manner. Bake at 375oF for 6 minutes, or until slightly browned on the bottoms. Do not over bake!

Friday, October 14, 2011

Friday with Tierra!

Hey all!! I know I disappeared there for a long while! Im sure you were all just so worried... lol.. Well I am alive... I got so busy with work that I kept forgetting and the next thing you know a couple months has gone by! I sincerely apologize!
Sorry for letting you down Jessica but I am going to do my best to start back up on Tuesdays. Since we got smart phones I never get on the computer and currently our internet isnt wireless so I havent been getting on as much. Anyway i know excuses excuses!

Well today I am gonna share a recipe I got off of pinterest.com. It is such a simple fast, easy snack!

Pretzel Bites!
http://www.justgetoffyourbuttandbake.com/?p=932

Ingredients

5-10 thawed Rhodes Rolls (1 roll makes 4 bites)
1/2 cup melted butter
Cinnamon Sugar Mixture (1 cup sugar, 1 1/2 tsp cinnamon)
1/2 cup finely graded parmesan cheese

Directions

Once Rolls are thawed take a sharp knife and cut into four pieces like your cutting a pizza.
Get a medium sized sauce pan and bring water to a boil. Plop no more then 10 pieces into the boiling water for about 45 seconds. They will puff up. Use a slotted spoon to take them out and placed on a cookie sheet with a paper towel laid down to soak up the excess water. They might deflate a little but not to worry it will all work out!
Once you are all done with that place them on a greased cookie sheet and put in the oven to bake at 375 for 15 minutes or until golden brown. (Now i have a gas stove so the heat comes from the bottom and not the top. So they did not all get golden brown and you have to watch the bottoms so they dont burn. In my oven it only took about 10 minutes)
While that is baking melt the 1/2 cup of butter and put in a big ziploc baggy. Also put the Cinnamon Sugar mixture in another big ziploc baggy.
When bites are done first put them in the butter, seal the bag and shake!!! Then add into the Cinnamon Sugar, seal the bag, and shake!! Use tongs to take them out and place on a plate.
You can also do just plain ones with butter and sea salt!
You can also shake them in a bag with butter, Parmesan and garlic. Which I did but the Parmesan was not the right kind so didnt work but my husband liked them!

A couple of different sauces to use from that blog are: (I made the vanilla glaze one which was great but i did not do the cheese one. My friend who was with me made a glaze with just powdered sugar and orange juice!! It was my favorite!!)
VANILLA GLAZE
1 cup powdered sugar
2 tablespoons milk
1 tablespoon melted butter
1 tsp. vanilla extract.
Combine sugar, milk, butter and vanilla and mix well.
CHEDDAR DIP
1 Tablespoon butter
1 Tablespoon all purpose flour
1 cup milk
1 1/2 to 2 cups of grated Cheddar Cheese.
Melt the butter in a med. size saucepan over medium heat. Add the flour and stir until blended, and
butter has turned lightly golden brown. Slowly whisk in the milk and cook until thickened slightly. Remove from heat and stir in the Cheddar Cheese until smooth and all of the cheese has melted. Season with salt and pepper. Shake a few red pepper flakes into sauce for added zing!

If you go to her blog it shows really good pictures of step by step process. You will notice some differences between her steps and mine just find whatever works for you!!

A couple days later I went to pretzelmaker and got some pretzel bites! And to be honest I really enjoyed these ones wayyy better! I do plan to find a pretzel bite recipe making my own dough but this is such a nice easy fast way to make a snack!Sorry for the lame picture lol. We made these at night and the lighting in my house is horrible. So go check out the pics on the other blog! They are great~ (Going clockwise from the left are Cinnamon sugar, parm and garlic and butter and salt)
This was such a fun girls activity!


Enjoy!!

Wednesday, October 5, 2011

Caramel Apple Cupcakes

I have always loved cooking and baking.

I've always put the two together and said I loved them both. Probably equally.

But not anymore. I think I have finally decided that my favorite of the two is baking. It is so, so much fun!

As I told a friend recently, there are a lot of variables when it comes to baking. There are all kinds of things you can do differently that will change the outcome of what happens when you bake. There are also things beyond your control, like the way your oven heats, that also affect your baked goods. The best thing to do with those things beyond your control is to experiment and learn what you can do to still get what you want with what you've got. For example, in one of the apartments we have lived in, our oven heated too warm. We experimented and finally learned that the best way to get things to turn out the way we wanted was to turn down the temperature 25 degrees before baking. No more burning or over cooking. Perfect.

As far as variables that you can affect, there are all kinds of secrets out there about what to do/not to do for your baking to be a success. I won't pretend to be an expert on any baking secret, but I have found a few things that really help with baking.

Number one: people like shortcuts. They like cutting corners, taking the easy route, simplifying things. And, hey, I'm all about simplicity! Life is way too complicated as it is, no use making anything more complicated than it has to be. However, when it comes to baking, cutting corners is a bad idea. If a recipe says to add and beat eggs one an at a time, do it one at a time. I know, it takes a whole two minutes longer. Must save those minutes, right? Wrong! In baking, it really does make a difference. Pinky swear. Now, let me just say that I am almost the complete opposite when it comes to cooking. Experiment, change things up, do things differently, whatever! But when it comes to baking, just follow the recipe instructions.

Number two: margarine cannot always be used as a substitute for butter. I am a total advocate of saving money and I totally get that margarine is so much more affordable than butter. And I'll be totally honest and admit that I use margarine in place of butter almost any time I make cookies. But I also almost always use real butter in cupcakes and frosting recipes. It truly does make a huge difference.

Number three: mixing sugars and fats {i.e. - sugar and butter or sugar and oil} needs to be done thoroughly. While you're beating the two together, if you mix it long enough {sometimes it only needs a minute or less, but longer than just enough to mix them basically together}, you'll notice that the color starts to change. That's a good thing and it's what you want. I don't know the science behind it, but it creates wonderful things in your oven. Not all recipes need this much mixing, but every time I've done it this way, I end up with a better product.

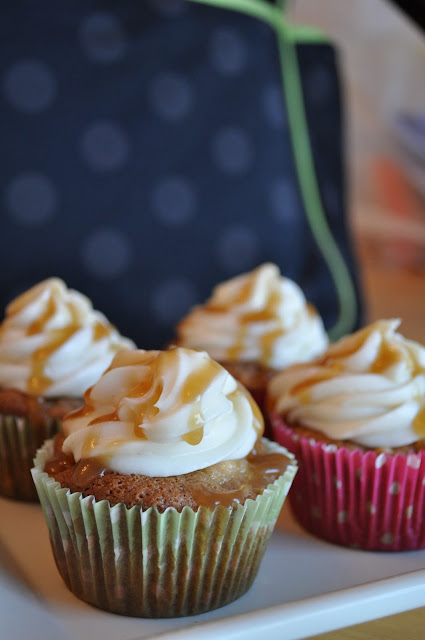
That's enough "secrets" for today. Let's get on to these cupcakes, shall we? These cupcakes are so good. Seriously, I had about five different people ask me for the recipe within a couple days. I made two batches of these cupcakes within four days. They are just that good.


Caramel Apple Cupcakes
Recipe from Crazy About Cupcakes, page 53

1 cup firmly packed light brown sugar
1/2 cup vegetable oil
2 tsp ground cinnamon
1 Tbsp vanilla extract
2 large eggs
2 cups all-purpose flour
1 Tbsp baking powder
1/2 tsp salt
2 medium sized tart apples, peeled, cored, and chopped small


Directions:
Preheat the oven to 350. Insert liners into a cupcake pan.
In a large bowl (I use my stand mixer) beat together the brown sugar, oil, cinnamon, and vanilla with an electric mixer on medium speed. I usually mix it for at least a minute, or longer if it needs to be mixed more. Add the eggs one at a time, beating for one minute after each addition.
In a separate bowl sift together the flour, baking powder, and salt. I always sift in my first cup of flour and then add the baking powder and salt to the second cup to sift with the flour.
Slowly add the dry mixture to the wet mixture. I add about a 1/4 or 1/3 of the dry mixture at a time, mixing well after each addition. Beat until well blended (don't forget to scrape your bowl!). Stir in the apples.
Fill the cupcake liners one-half to three-quarters full with batter. Bake for 20-25 minutes or until a toothpick inserted in the center of the cupcakes comes out clean. Cool cupcakes in pan {I've tried cooling my cupcakes in an airtight container before to preserve the moistness, but I generally find that cooling them in the pan works just as well}.


To assemble Caramel Apple Cupcakes:
Once all your cupcakes have cooled, poke three holes in the tops of each cupcake using the handle of a serving spoon {it's best if your handle is nice and round so you get good holes}. Make up a double batch of Caramel Sauce {or do like I did and make one batch for pouring over the cupcakes and then another for drizzling - whatever your preference}. Pour the caramel sauce over each cupcake, being sure to fill up the holes really well. Once you've filled up each cupcake, go back and pour caramel sauce over them again. Did I mention that this isn't a cupcake for sissies? 'Cuz it really ain't. Yes, pouring caramel sauce over cupcakes twice might seem awful indulgent. But it is oh, so good! And somewhat necessary, that first round gets soaked up pretty quick. The second round gives it a nice soaking and really gives the cupcake that caramel flavor.
Now make up some Ginger Cream Cheese Frosting. Pipe it onto your cupcakes. Don't be stingy, now. Pipe it on nice and high {my husband keeps telling me that cupcakes don't need that much frosting. But come on! They look so awesome!}. If you'd like a little tutorial about piping frosting, check out Your Homebased Mom. She has a nice video tutorial with some good tips about cupcakes. Then spoon the remaining Caramel Sauce over the top of the cupcakes {I prefer to put the sauce into a squeeze bottle and drizzle it over with the small nozzle - this really gives me control of how my cupcakes look}. And lookie there - you've just made yourself a gourmet cupcake! Enjoy!
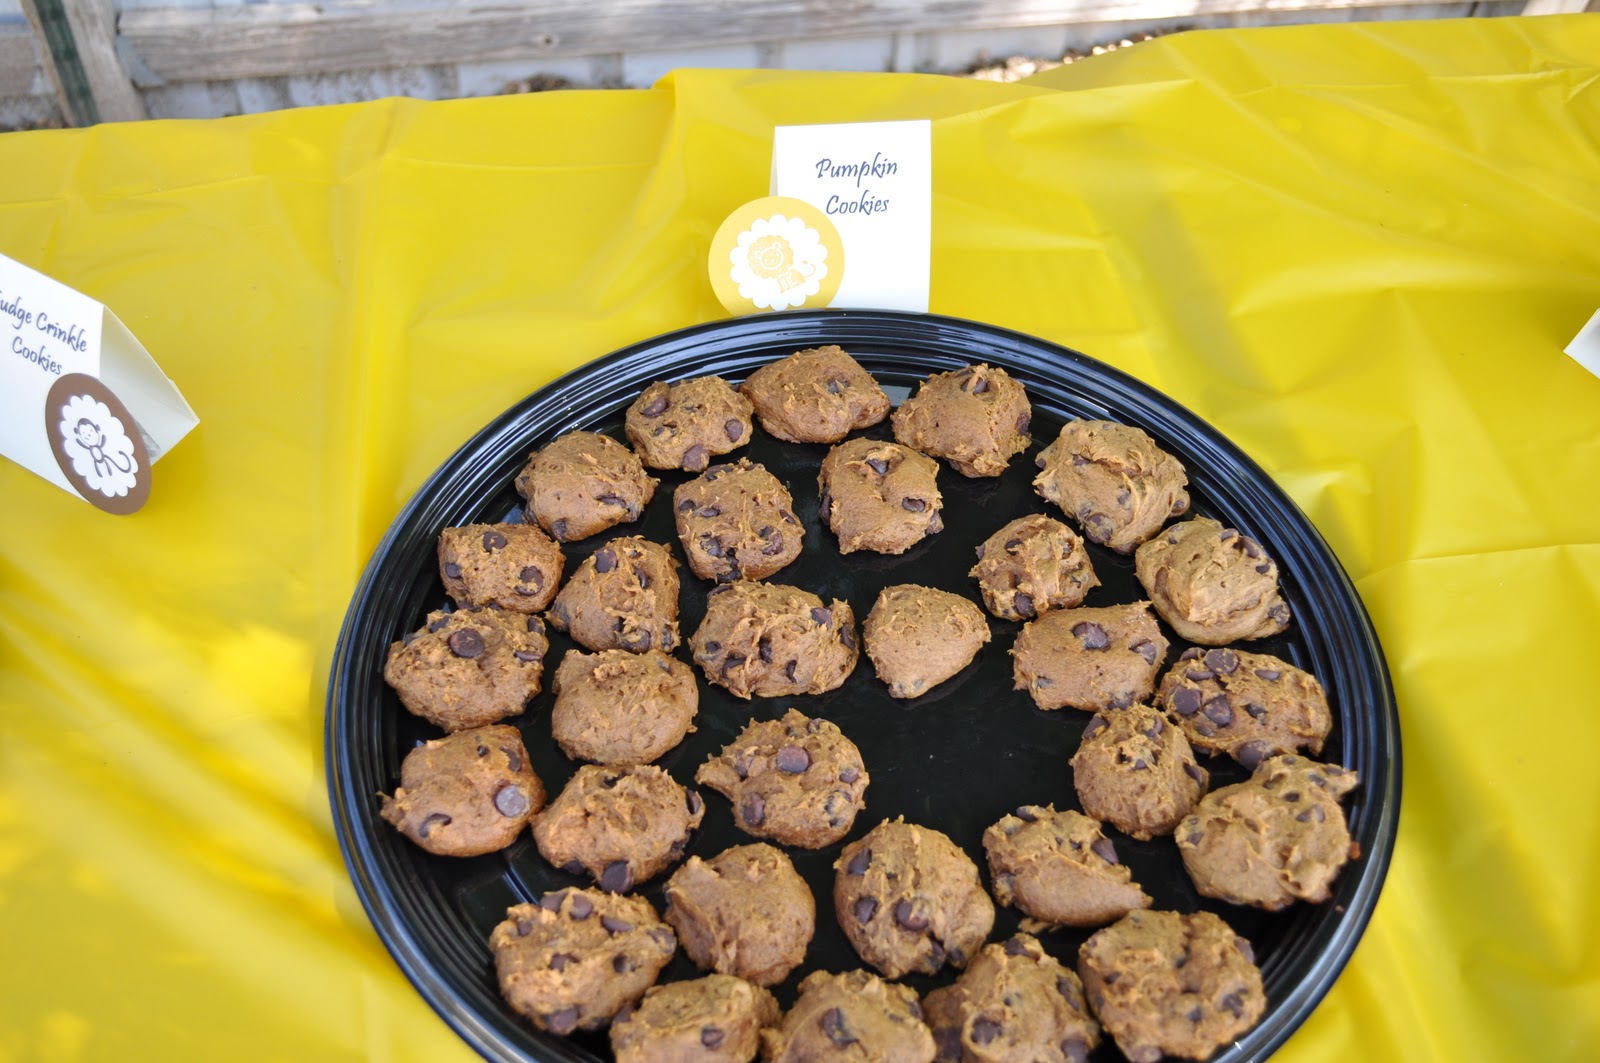
Sunday, July 3, 2011

Hootenany Pancakes

If you tried, you could probably find hundreds of German Pancake recipes around the internet. I don't even think you would have to look very hard to find them. It's because these pancakes are so delicious and soooo fun! I can guarantee you that any child would go crazy over these puffy pancakes. When I was growing up, we called them Hootenany Pancakes. My husband had never heard of such a thing and finally convinced me to make some German pancakes. Low and behold! They are the exact same thing! But since Hootenanny is a whole lot more fun to say than German, I'm sticking with the name I grew up with!


See all that yummy puffiness? Delicious!

Hootenanny Pancakes
Recipe from Bingham Family

1/4 cup butter
6 eggs, well beaten
1 cup milk
1 cup flour
1/2 tsp salt
1/2 tsp sugar

Directions:
Preheat oven to 400 degrees.
Melt 1/4 cup butter in a 9x13 in your warm oven.
While the butter is melting, mix all remaining ingredients together for one minute. When butter is melted, pour batter into the pan and bake for 20-25 minutes, or until the edges are golden brown and puffy.

Saturday, July 2, 2011

Brown Sugar Muffins

I am a muffin girl. I loooooovvee muffins. I could eat them for every meal. Sometimes I do. Especially if they are these muffins. I think these are quite possibly my most favorite muffins on this planet {that I've tasted anyway - I haven't tried each of them, after all}. In fact, that's all I can't think of to say about these. They are my favorite. You should try them. Maybe today. Like, right now. Heck, I think I'm going to go make them right now. Except that I'm not home. This here post, it was scheduled. Because I promised you a breakfast week, did I not? And since I'm gone today, the only way to keep that promise is to schedule my posts. Look at me being all organized. Everyone go look at the sky tonight. The moon is probably blue.

But, since I'm visiting my mother-in-law and this recipe is originally hers, maybe I can get these muffins after all. :)


I know, it's not the greatest photo. I took this ages and ages ago. So please forgive me. Next time I make them, I'll try to remember to take a better photo. :)
 Brown Sugar Muffins
Recipe from Olive Harwood

2 cups flour
1 cup brown sugar
1 tsp baking soda
1/4 tsp salt
1/2 cup butter, softened
1 egg
1 cup milk
1 tsp vanilla

Directions:
Preheat oven to 400.
Mix dry ingredients in a medium bowl. Make a hole in the middle of the mixture. Set aside.
In another medium bowl, combine all the wet ingredients. I generally find that it works best if I combine my egg and butter first, then the other things. It also works best if your egg and milk are at room temperature so the butter doesn't suddenly harden up when the cold ingredients hit it. But these always turn out fine without getting everything to room temperature, so honestly, I usually don't worry about it.
Pour wet ingredients into the hole you made in your dry ingredients. Mix just until moistened.
Drop into well oiled muffin pan about 2/3 full. Bake for 25 minutes or until golden brown.

Thursday, June 30, 2011

Flaky Buttermilk Biscuits

These other biscuits are also delicous. It's actually hard for me to decide which of the two are more delicious. Does a person have to choose something like that? I hope not because I'm choosing not to. :)


These biscuits take a bit more work but it really depends on what you are going for. These are flaky biscuits and they have a lovely, light texture. I love the honey as a sweetener. It adds a special something to these that is missing in a traditional biscuit. And the flaky-ness of them makes them even better! They are actually quite perfect and I kind of think that the only way you could mess them up would be to bake them too long until they turn black. Not that I would know from any kind of experience or anything. I'll just stop talking now.

Wait, no I won't! I have a recipe to share! {Yes, I'm a dork. Why would you ask?} I have a few things I'll be explaining along the way so be patient with me as we go. I promise they are worth it!

*Note: If you do not usually buy buttermilk {like me} you can "make" some really easily. Put a tablespoon of lemon juice or white vinegar into a one cup measuring cup. Fill the rest of the space with milk. Allow to sit for about five minutes. Now you have a nice equivalent to buttermilk that works beautifully in recipes.

Now, I know these biscuits don't look like much in the photo. It's really pathetic, actually. I didn't follow the recipe as well as I should have {notice all the notes throughout the recipe} and they didn't rise as they should have. Seriously, don't work this dough too much. You'll get sad biscuits like mine. Also be sure to take them out of the oven when the timer goes off. That usually makes for better biscuits, too.


Deliciously Flaky Buttermilk Biscuits
Recipe from The Sisters Cafe

2 cups all-purpose flour (9 ounces)
2 1/2 teaspoons baking powder
1/2 teaspoon salt
5 tablespoons chilled butter, cut into small pieces
3/4 cup fat-free buttermilk {see note above}
3 tablespoons honey

Directions:
Preheat oven to 400°.
Weigh or lightly spoon flour into dry measuring cups; level with a knife. {It is important to lightly measure your flour because it helps keep the biscuits light.} Combine flour, baking powder, and salt in a large bowl; cut in butter with a pastry blender or 2 knives until mixture resembles coarse meal. Chill 10 minutes.
Combine buttermilk and honey, stirring with a whisk until well blended. Add buttermilk mixture to flour mixture; stir just until moist. Don't stir too much! You don't want those biscuits to get tough.
Turn dough out onto a lightly floured surface; knead lightly 4 times. {Only that many. I swear you'll be sorry if you do more. Remember the whole tough and sadly unrisen biscuit thing.} Roll dough into a (1/2-inch-thick) 9 x 5–inch rectangle; dust top of dough with flour. Fold dough crosswise into thirds (as if folding a piece of paper to fit into an envelope). Reroll dough into a (1/2-inch-thick) 9 x 5–inch rectangle; dust top of dough with flour. {Don't worry about making all the dough stick together as you continually roll it out. Leaving the layers creates the flakiness of the biscuit.} Fold dough crosswise into thirds; gently roll or pat to a 3/4-inch thickness. Cut dough with a 1 3/4-inch biscuit cutter to form 14 dough rounds. Place dough rounds, 1 inch apart, on a baking sheet lined with parchment paper or well greased. Bake at 400° for 12 minutes or until golden. Remove from pan; cool 2 minutes on wire racks. Serve warm.

LinkWithin

Related Posts with Thumbnails